smartthings_controller.ino – the Arduino code which communicated with the SmartThings cloud using the SmartThings Arduino library. I’m using an Uno.
device_handler.groovy – the device handler code. This defines the device for use in the cloud and its UI in the SmartThings app. It is specific to the hardware, but not the use of the hardware.
SmartApp.groovy – the SmartApp code. This defines how the device is used. In my app I tie specific hardware bits to specific device types (e.g. switch, switchLevel or musicPlayer).
Now that the SmartThings lab has released support for both Sonos wireless speakers and Hue lighting, I decided to build a custom switch using the SmartThings Arduino shield to interact with the system. The goal was to provide physical control over the systems without using a phone or tablet.
In my case, I wanted to be able to quickly:
Pause/Play all speakers in my house
Skip the current song
Turn groups of lights on and off
Dim the lights (not yet implemented)
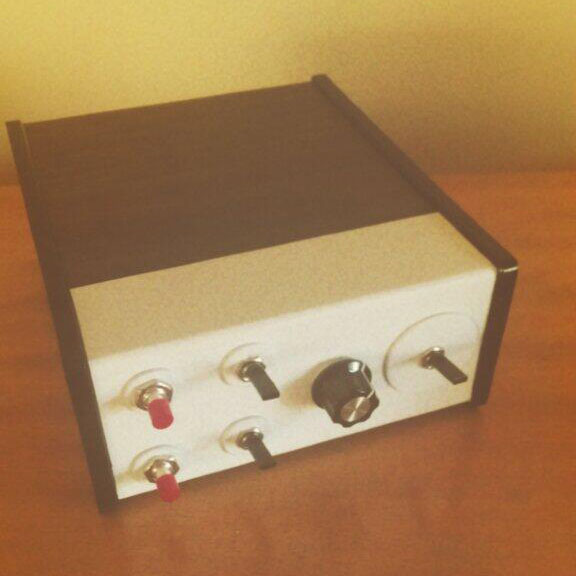
The hardware uses a reclaimed project box from the last century with an Arduino UNO and SmartThings shield inside. It includes two pushbuttons, three switches and a knob.
With the hardware put together, the next step was to create a custom Device Handler for the SmartThings cloud and write the SmartApp.
The Device Handler essentially creates a virtual version of the device. It identifies each button and switch in the hardware to provide the basic inputs and outputs used by my SmartApp. The Device Handler also defines the device’s UI that is presented within the SmartThings mobile app.
The SmartApp determines what happens when someone interacts with the hardware. For example, I define which switches will turn things on and off and which ones will call play and pause. The App also defines the UI used to configure the app and map specific switches to specific Sonos and Hue hardware.
Documentation for writing handlers is lacking and this required a good deal of trial and error. In fact, I have not yet been able to hook up the knob within the handler. Once I do, I will post the bits on Github; but, for now if you want to work on something similar, I found this Arduino Code and corresponding Handler Code quite useful.
Another other bit of documentation that came in handy for how to control the Hue and Sonos devices is this list of device types and capabilities.
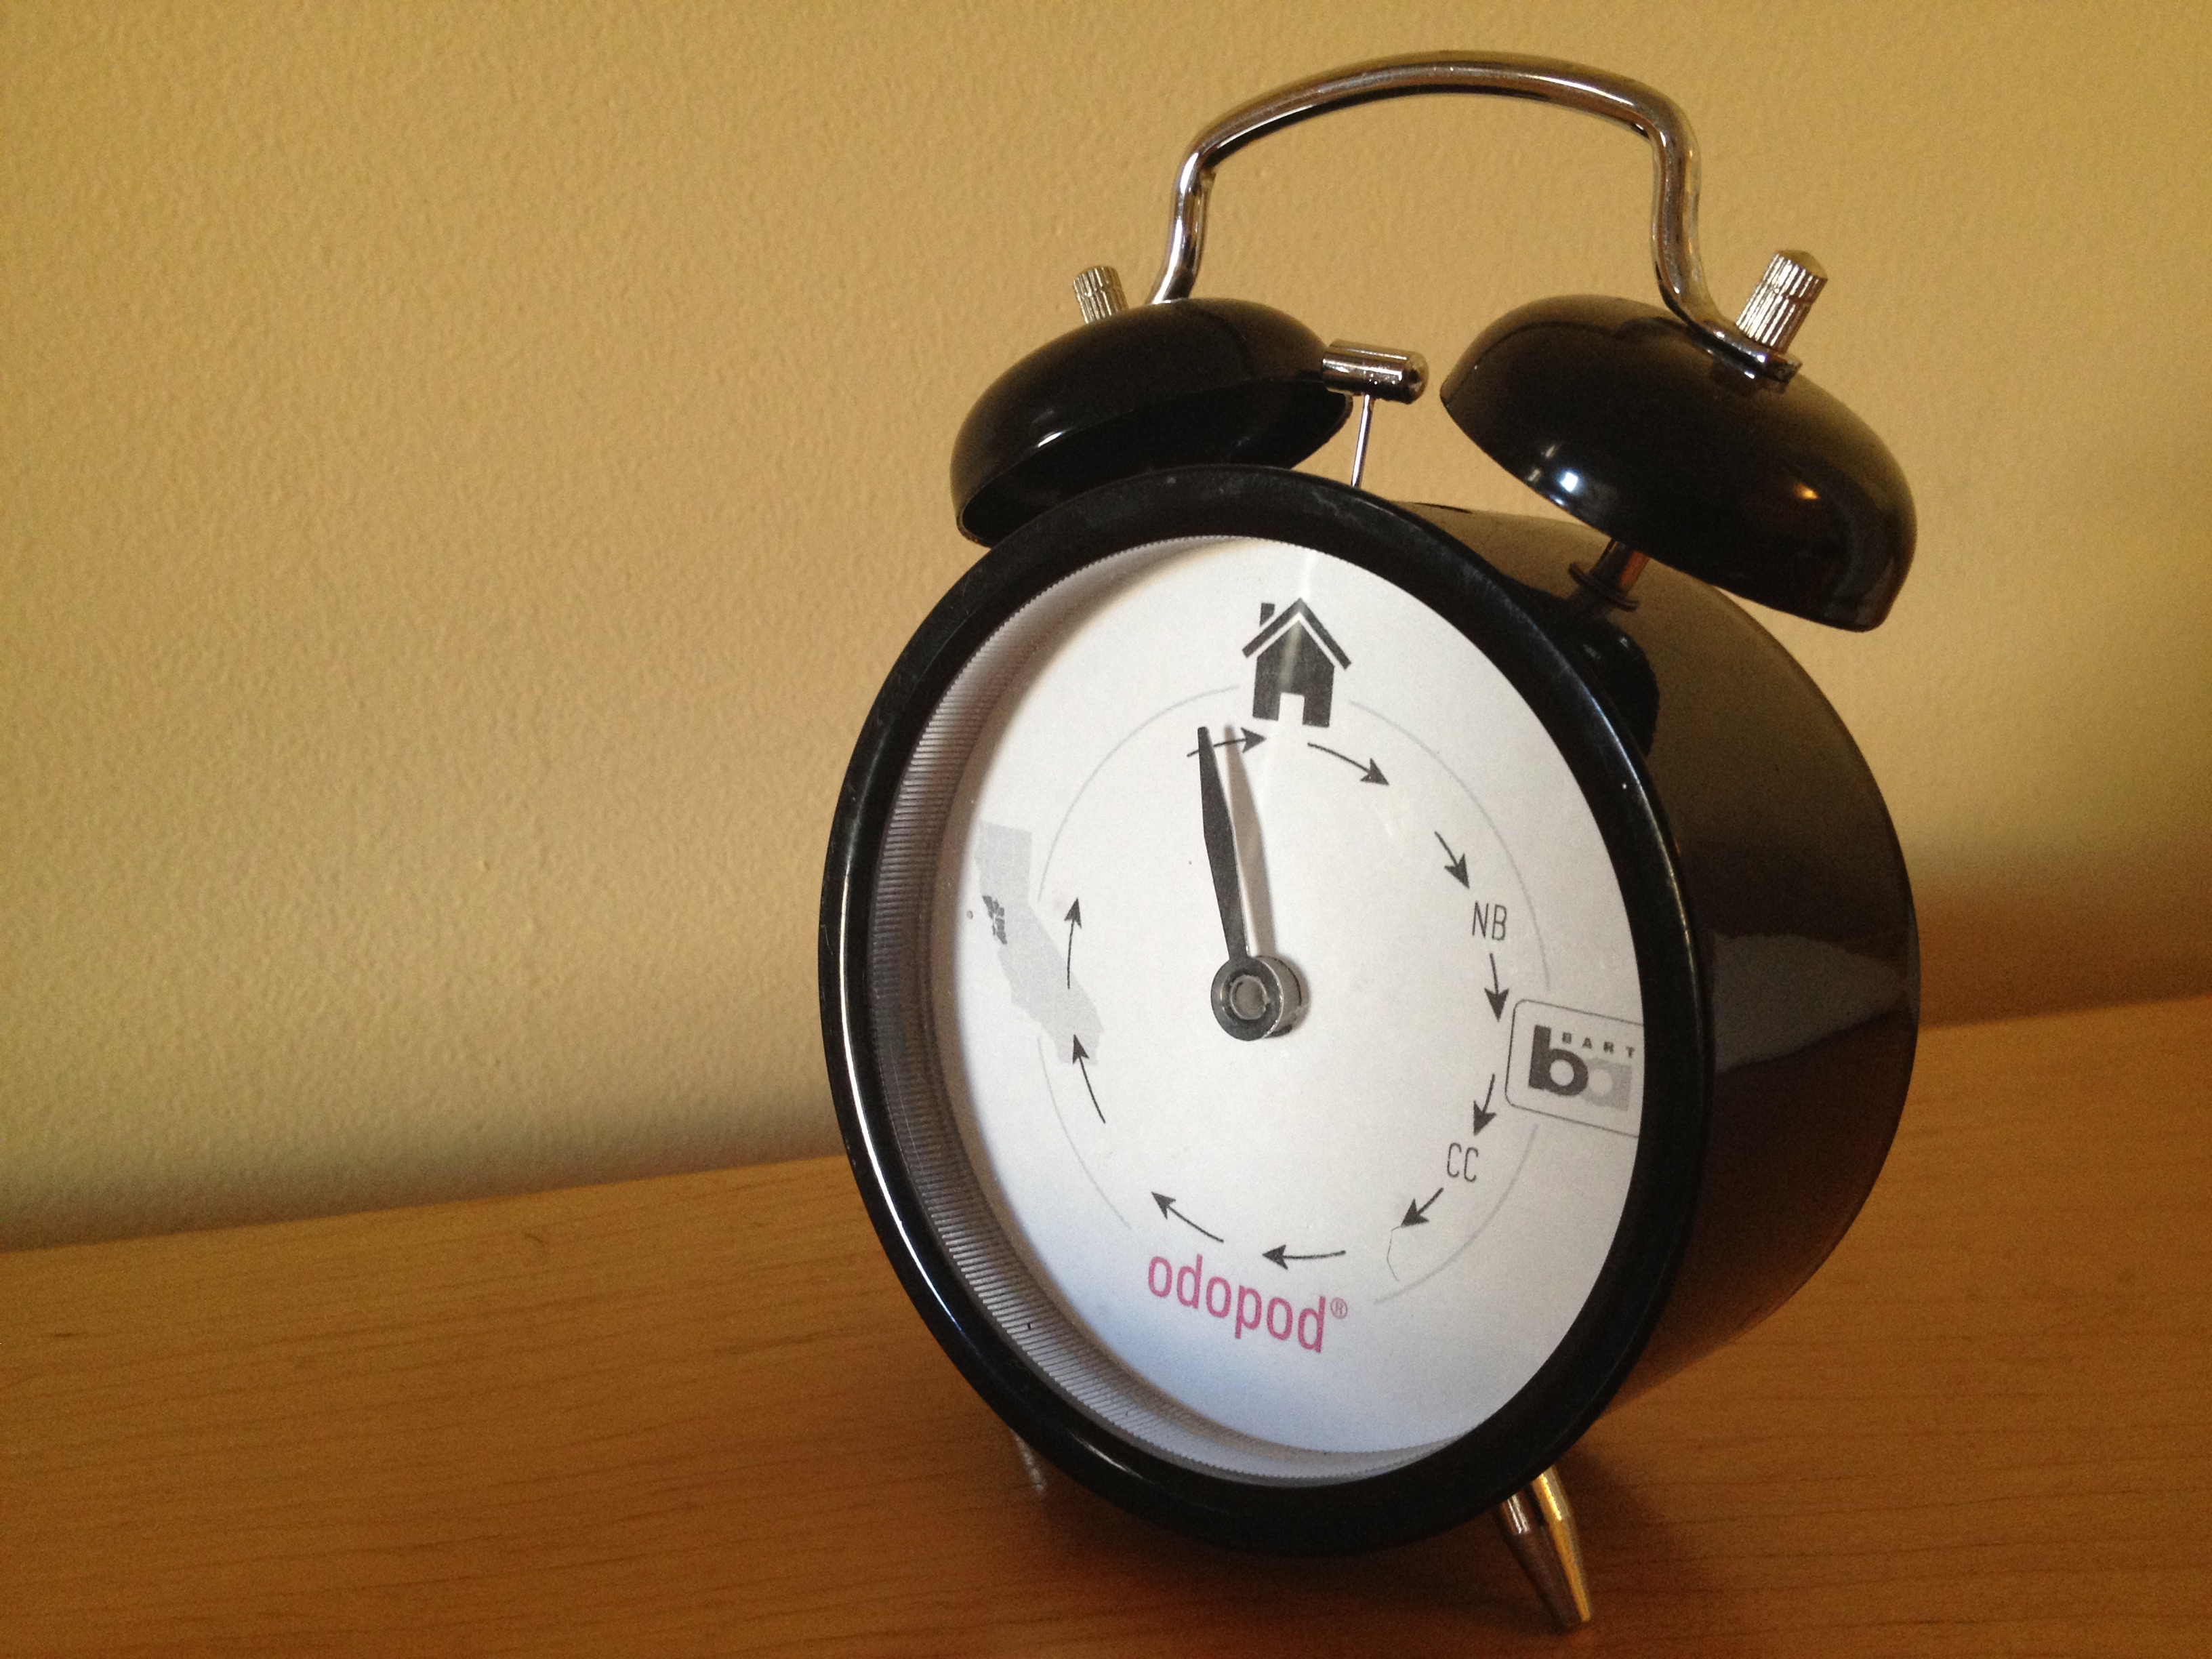
This Ikea clock was modified to display my location for my family at home. It is nice that they can check up on me without checking online. The kids are especially enjoying it.
I use 5 different geofences in an iOS app, monitoring entrances and exits for key points on my daily commute (and the bay area as a whole). The app reports the triggers to a Google App Engine app. The minimal time allowed by iOS is enough to get the call through to the server. GAE then passes the events onto the clock via the iDigi web service.
Inside the clock, I use a Fio and Xbee radio paired to my ConnectPort x2. iDigi is able to push messages through the ConnectPort to the Xbee and update my status.
It’s basic role is to convert a 3.5v Lythium Polimer battery to 5v for Powering an Arduino micro-controller. That is done with the + and – pins in the bottom half of my photo.
Additionally it has a connection for charging the battery without disconnecting it or removing it from the project. That is done with the (partially obscured) c and – pins toward the top of my photo.
Also toward the top is a switch that turns the power to the Arduino on and off. The battery charges regardless of this switches position. This LiPower is inside the project I am working on, so I’ve added an external switch (SPST) by connecting it to two of the pins of the on-board switch.
So far this set-up is working fine. I can plug a charger externally and switch the Arduino’s power while the battery is charging or not.
UPDATE: Since writing this, I have added a connection between the B pin on the Lipower board to an analog pin on the Arduino. By doing this I can now read the voltage of the battery and light a warning LED when it gets low. I found that the Lipower outputs 5v until the battery voltage drops below about 2.9v. At that point the Lipower switches things off to protect the battery.
I spent more time than I would have liked trying to get a basic Bluetooth connection between my Arduino and Flash applications. At first, I could not get anything working, then I switched to SoftwareSerial and could only send data to Flash (or coolTerm). Finally, I saw the note about not all pins on the Leaonardo supporting RX and I got it all working.
I’ve posted my code on GitHub, perhaps it will save you some time. I think I have removed all my dead end trials and everything that is included is necissary for it to work.
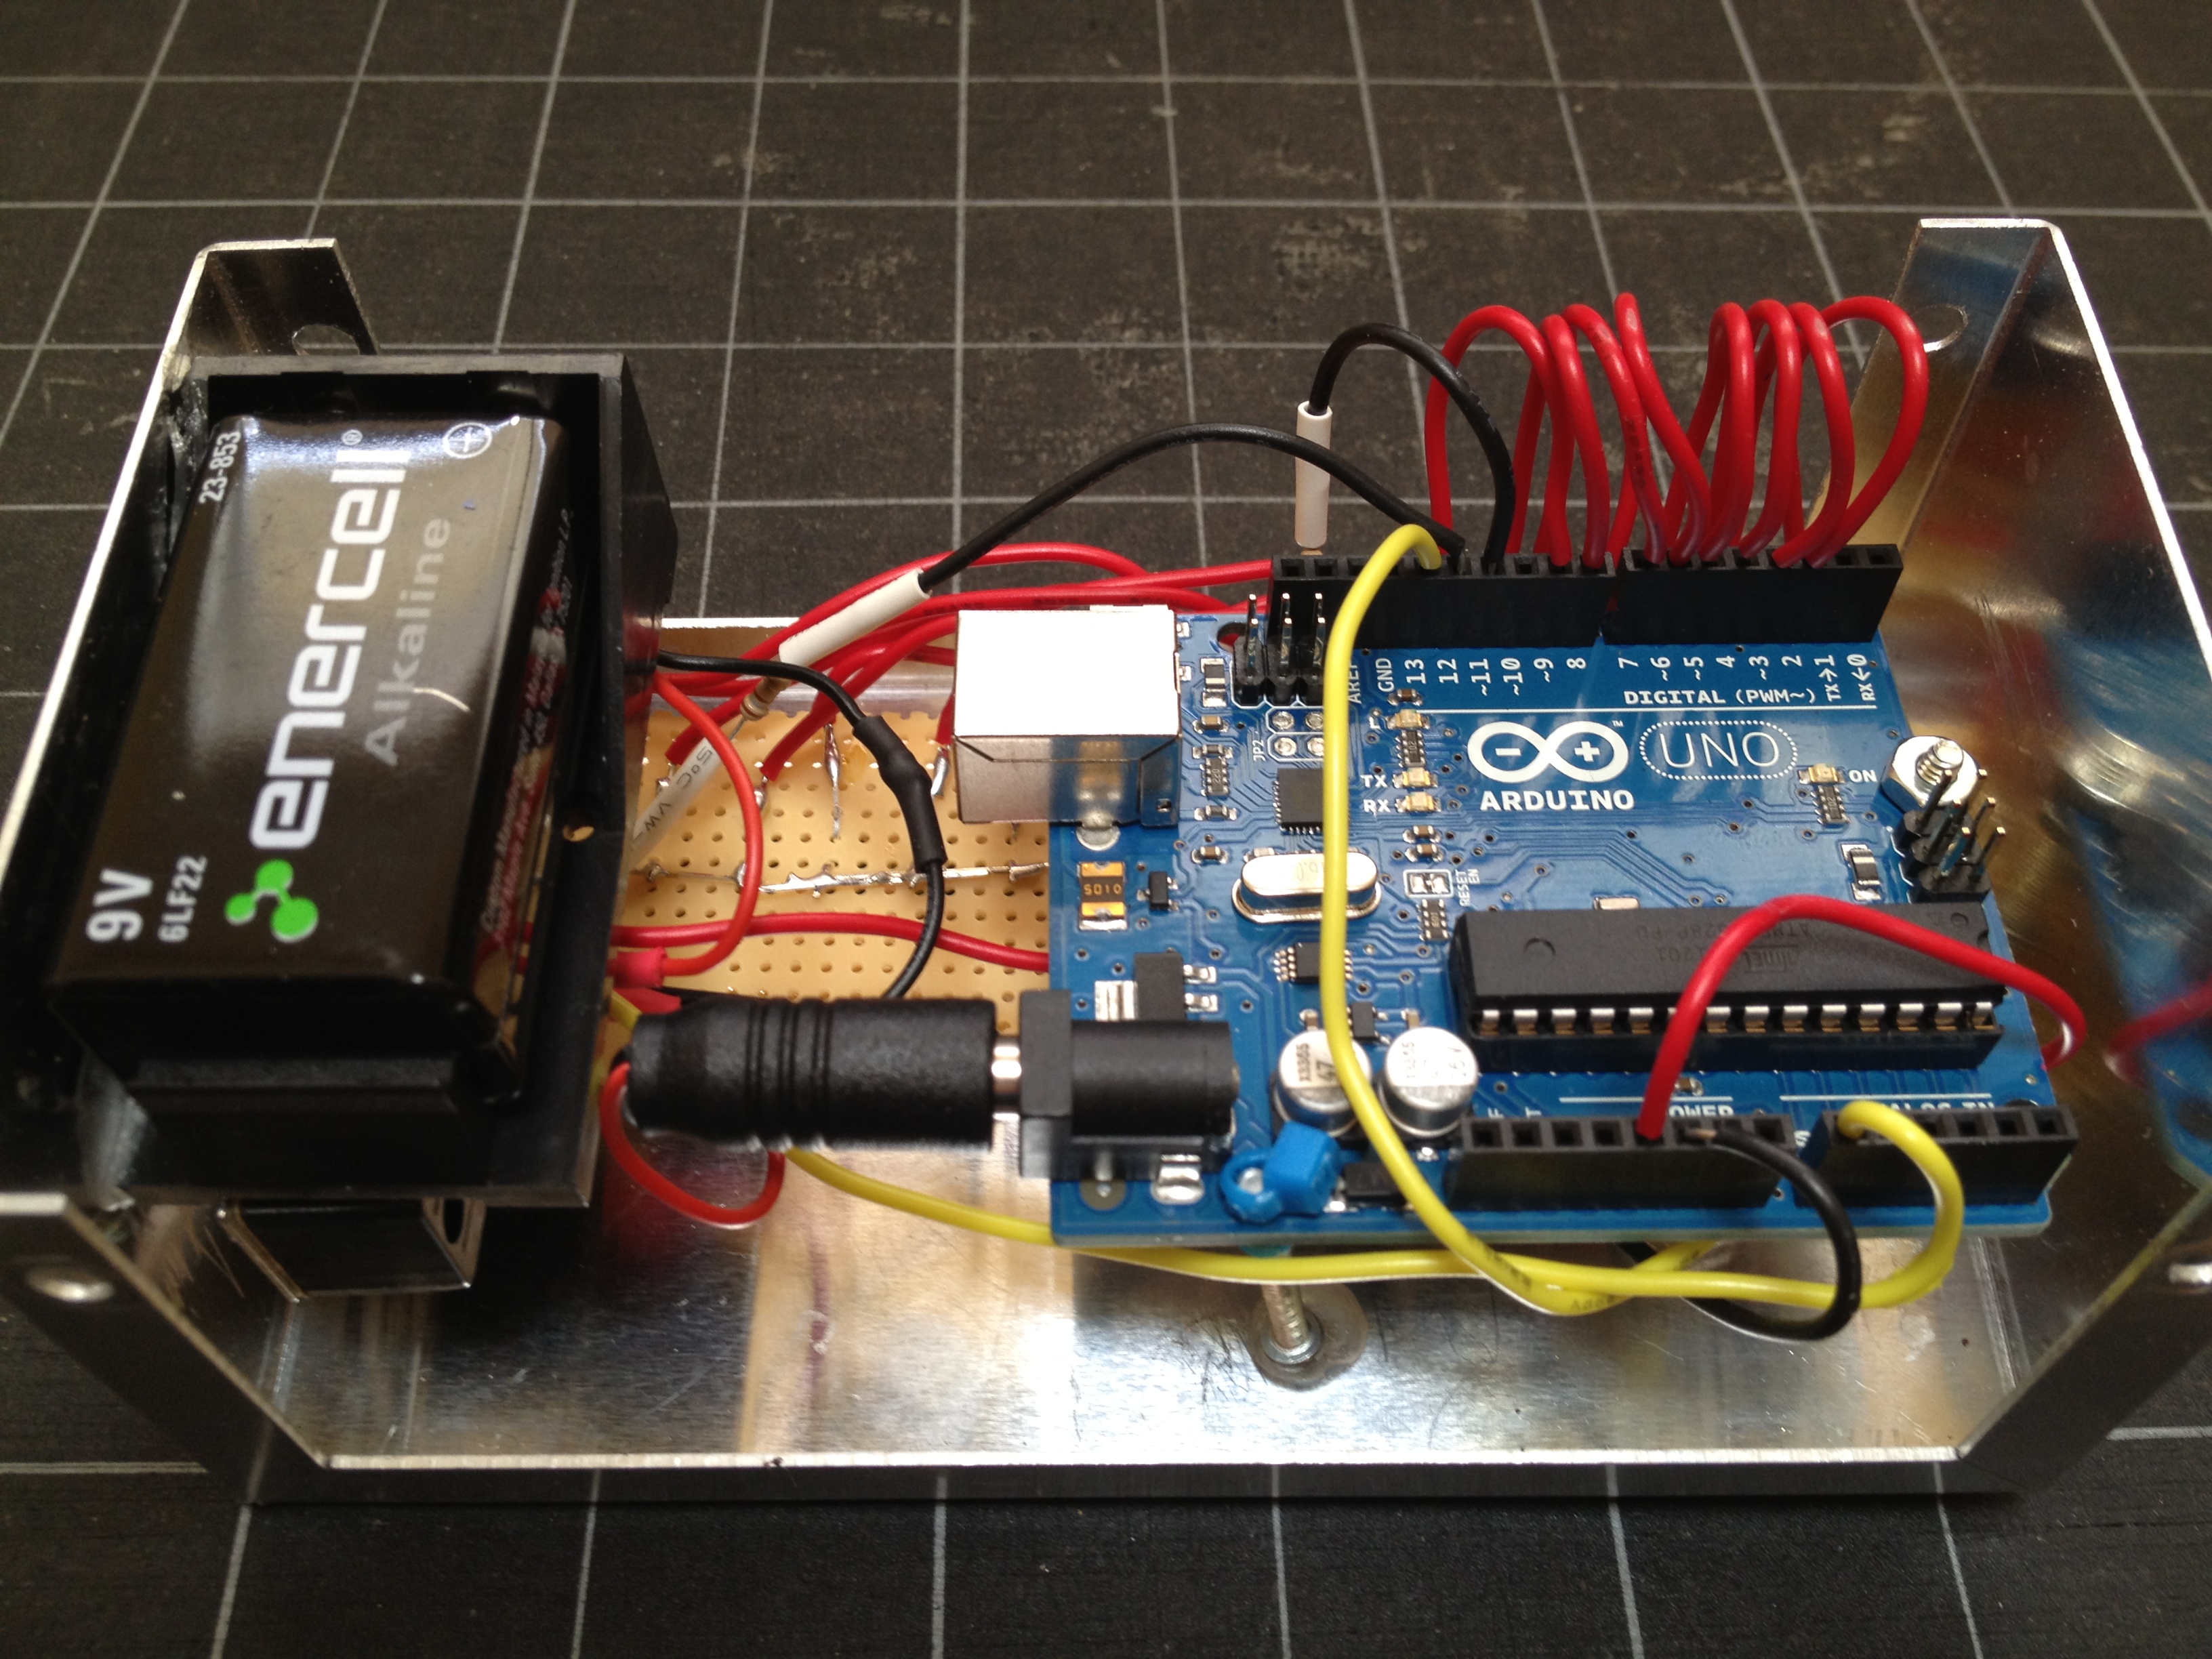
My kids love arcades where you can win tickets and buy prizes. Some of their favorite ways to win tickets are the various games with speeding lights zooming around a circle with a big button that stops the action and dispenses tickets. The ultimate goal is the jackpot light, which of course is bordered by the lowest value lights… timing is everything.
This year, as a prelude to our annual pilgrimage to the Santa Cruz Boardwalk, we designed and built training boxes. The guts (pictured above), include an Arduino Uno, 16 LEDs, a momentary switch and a 9v battery. Supporting systems include a potentiometer, assorted resistors and a very satisfying on-off switch. Everything is housed inside an aluminum project box that looks pretty good and relatively easy to work (except with is comes to anchoring anything that is not surface mounted).
Below is a video that shows the assembled boxes in action. The game has 16 different speed settings (controlled by the potentiometer) and 16 levels. Each time you stop the light on the final LED, you advance a level. If you miss that last spot three times in a row, you get knocked back a level. Finish all 16 levels and you get a fun little bonus.
Building your own toys
The kids really enjoyed designing and building their own electronic toy.
At ages 7 and 9, they are getting a good sense of what makes some of their other toys tick and are getting exposed to the benefits of iterative prototyping. Based on their feedback to the first version of the boxes, we replaced a micro pot on the inside of the box with the beefy, surface mounted knob next to the on-off switch in this version.
They also love the idea that in a couple months we can tear the whole thing down and build a different toy. We already have plans for some toys connect in a wireless mesh network for multiplayer games.
Last week, Guthrie Dolin and I presented at the Planning-ness 2012 conference. The conference was great, and I love it’s theme, “Get Excited and Make Things.”
The standard format for a session is present on a topic and then run a workshop in which conference participants make something to present back to the group.
In our session we provide an overview of the Internet of Things before going into detail about the potential of connected objects to encourage specific behaviors. We break down the components of an IoT ecosystem and discuss how they can be used to collect data and drive insights and change.
Following the presentation, the assignment was to use the framework and design a physical product and service around a personal object or situation. We provided a few catalysts and blank worksheets to help get people going. The results were great and we’ve posted each group’s worksheets on slideshare as well.
All-in-all, a great expreience and a ton of fun. Thanks to everyone who turned out to learn about the Internet of Things.
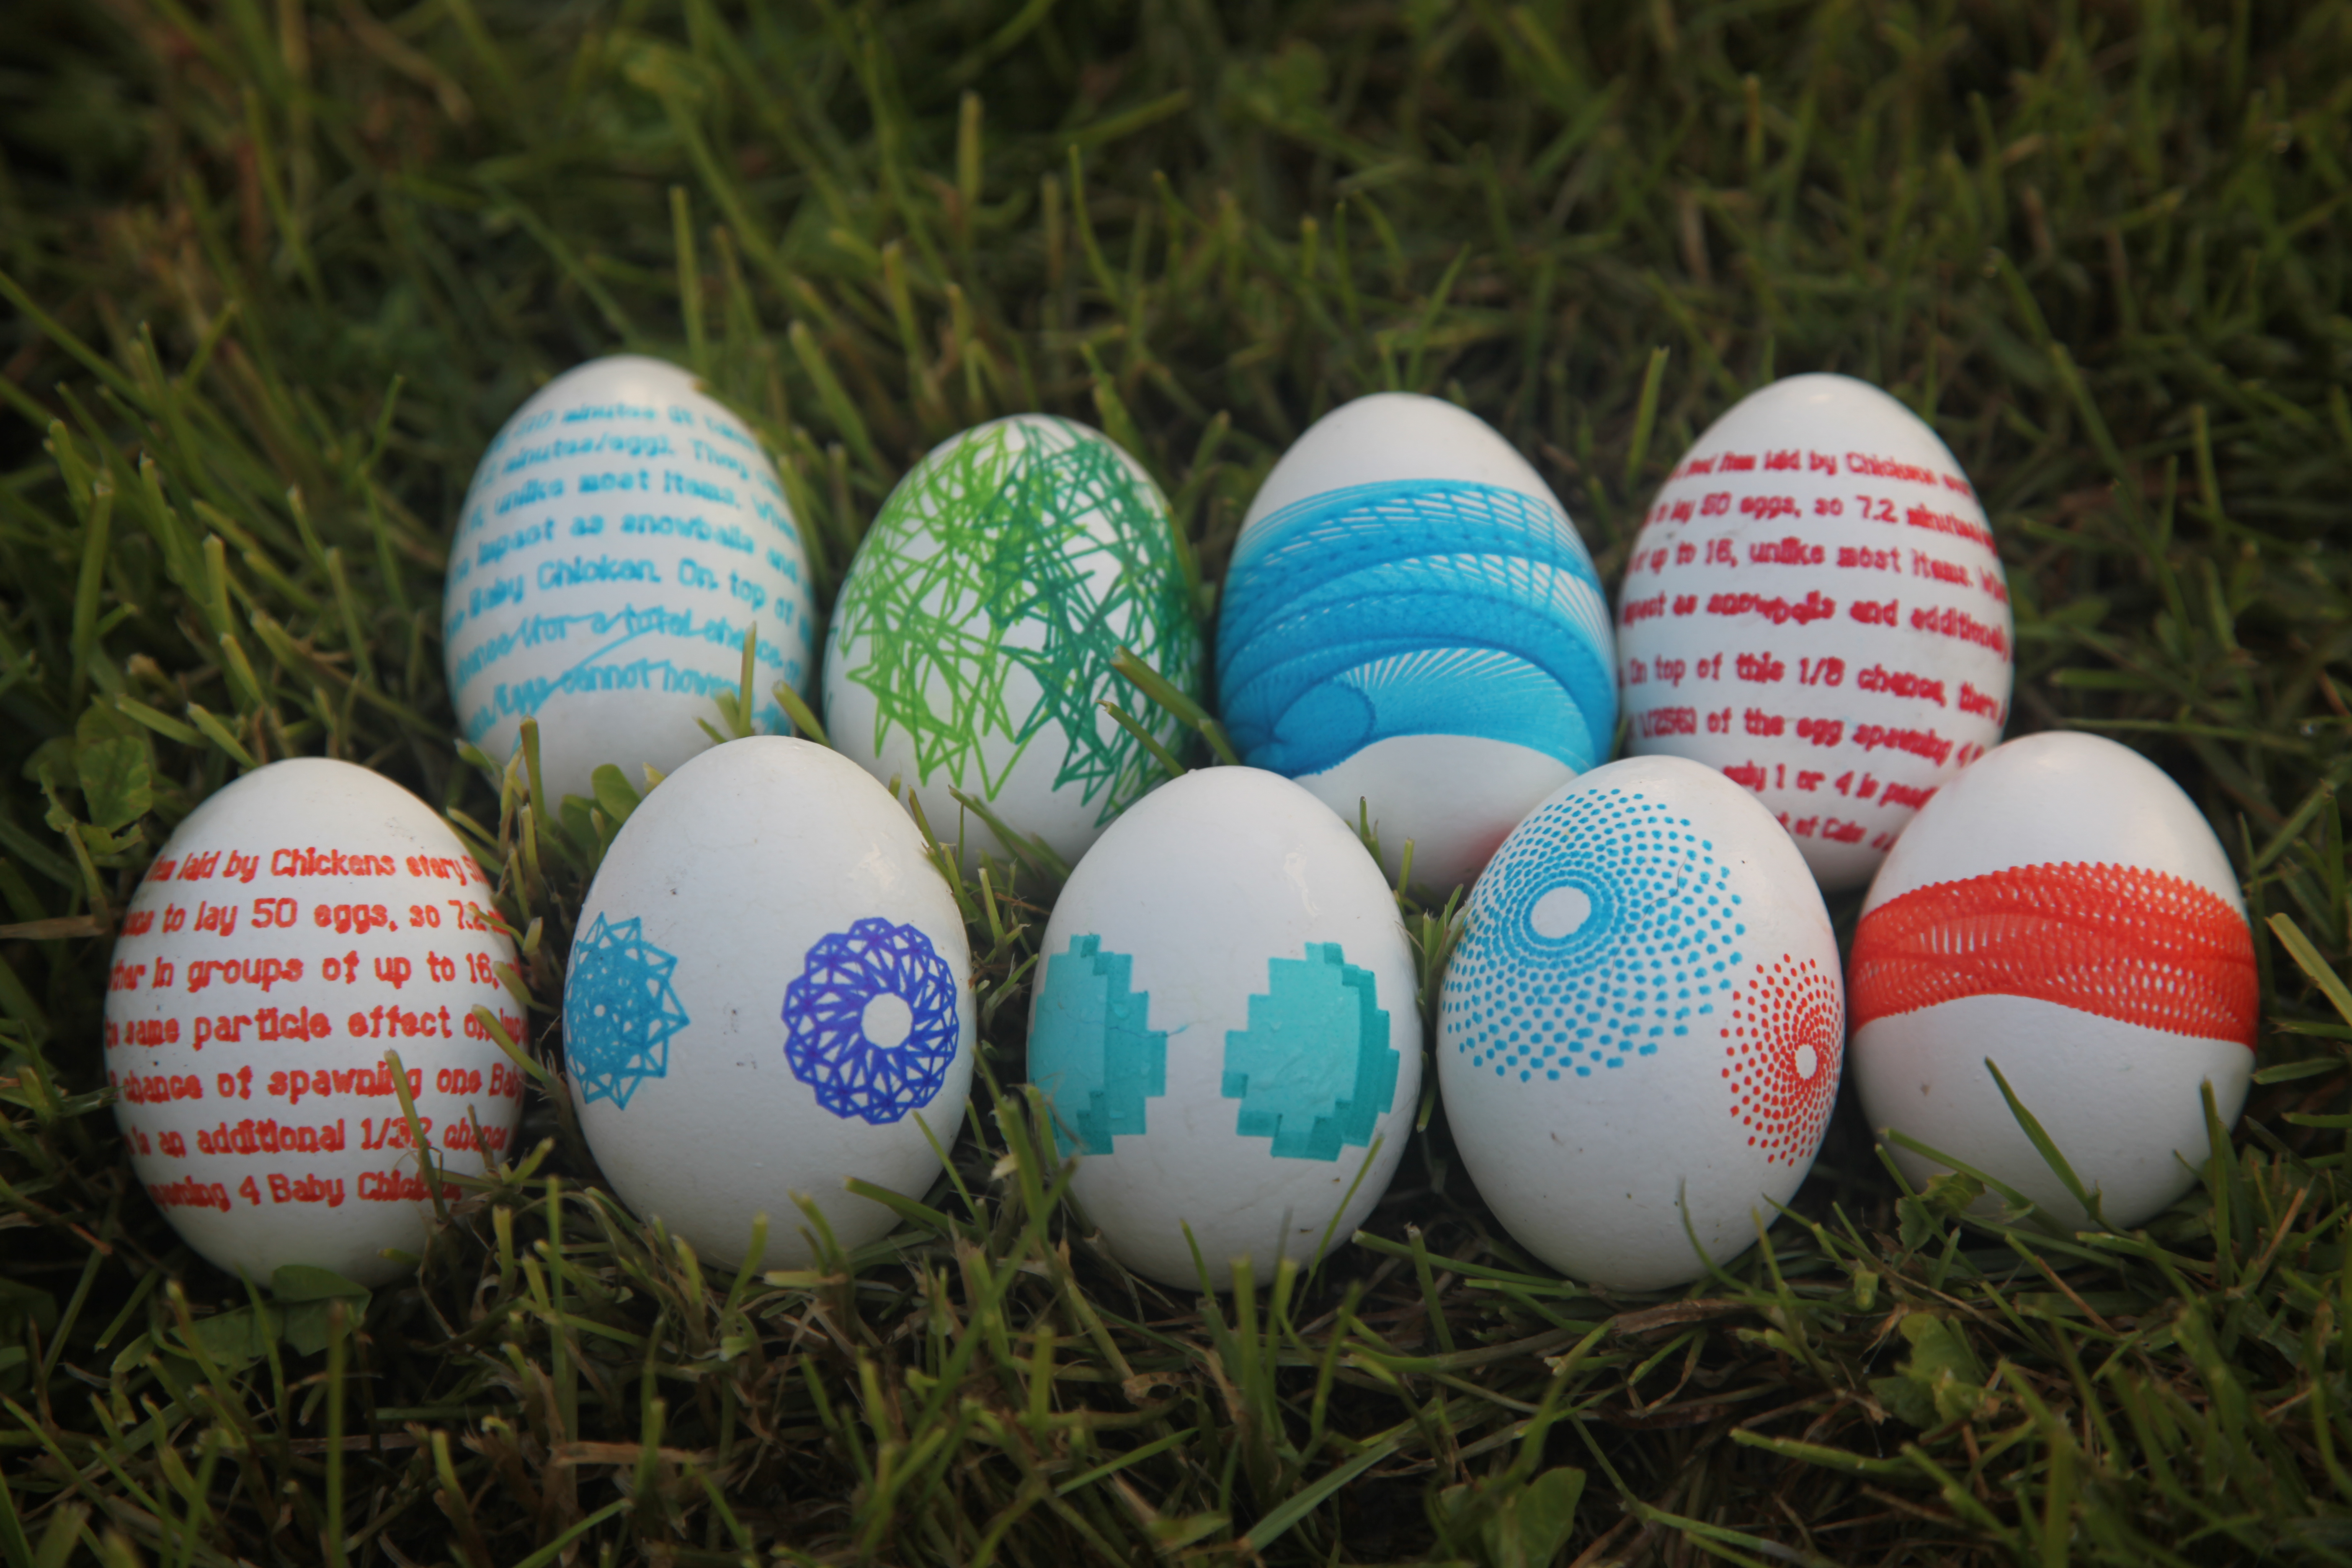
This year’s eggs were designed using Nodebox and Inkscape.
Charlie worked mostly in Nodebox. It’s patch-based programming was right at his level and copy, rotate and wiggle all got a lot of action.
Wyatt found inspiration in Minecraft and we worked together to write a letter writing script in Python to print out an wiki entry on egg. Then he created a vector version of the pixelated egg in Inkscape.
The video below shows some highlights from production.