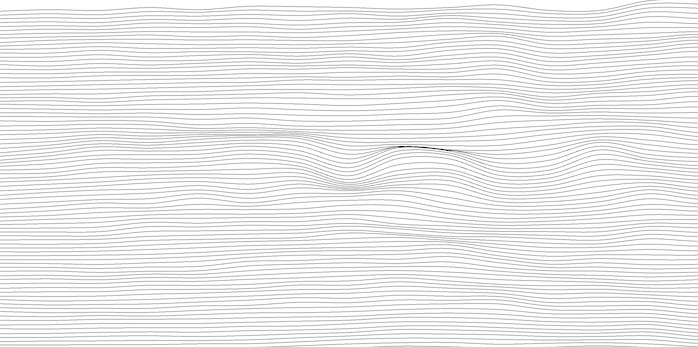
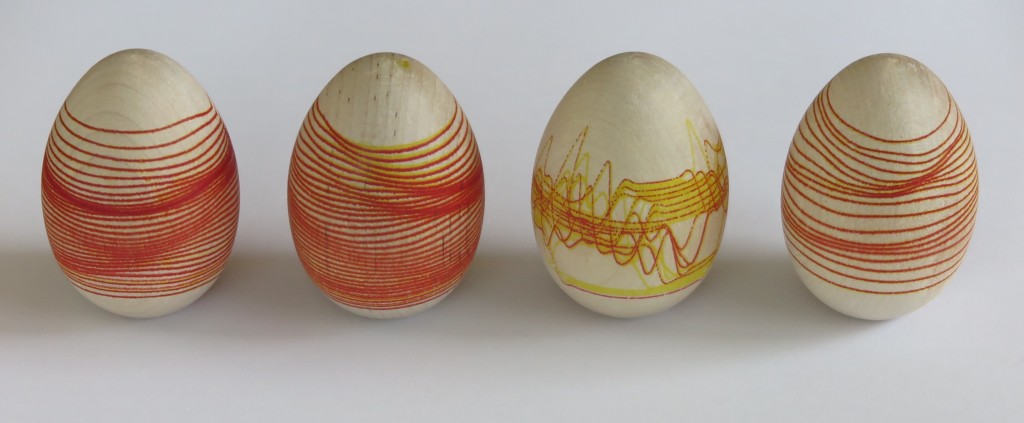
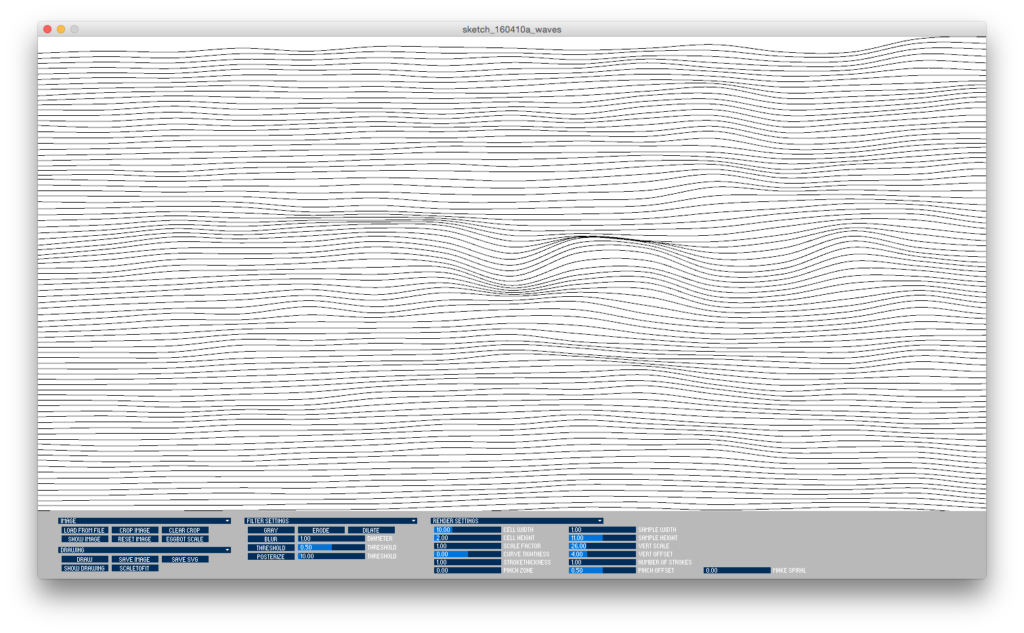
This study focuses on the wave algorithms used in this years eggbot drawings. The sketch supports importing an image, scans the brightness value and draws horizontal lines with vertical offsets based on variations in brightness. around any given sample point along the horizontal line.
2016 Eggs
This year, I’m using a new drawing app that I’ve been working on to generate files to load into Inkscape and draw using the Eggbot. In general the app processes an image file and creates an SVG based on it. These are several different renderers. The four eggs above are the most abstract. The algorithm draws wandering lines based on the brightness values of pixels in the image.
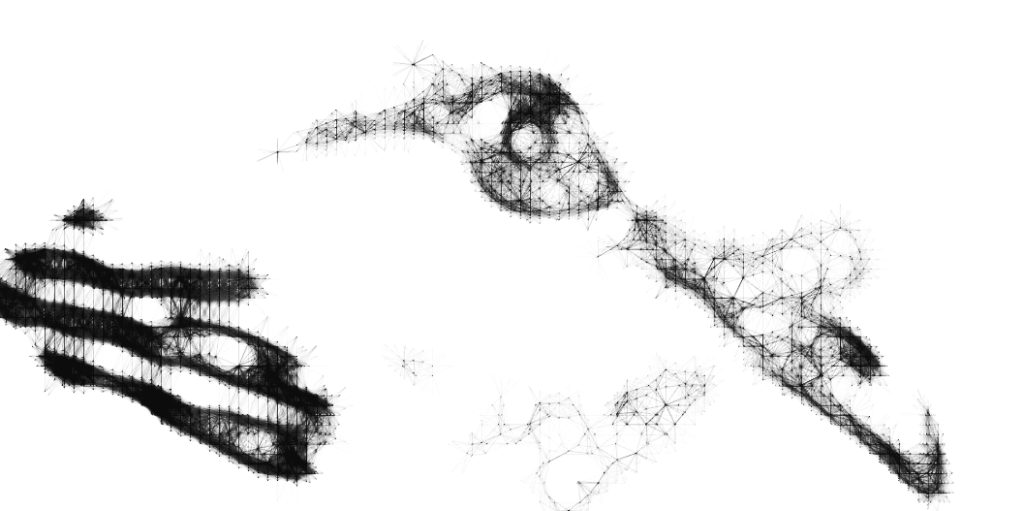
The image below uses a hatching program that can be quite photo realistic. I have not yet drawn it successfully using the Eggbot and sharpies. I did manage to draw it with pencil, only to have it smear off the eggshell.
Turtledove Study
Dad Finder, Map Edition
Three years after making my Dad Finder, I needed to update it to reflect my new commute. Rather than just print a new face for the clock, I decided to make a new version of Dad Finder with a new form factor and updated hardware.
I had picked up a frame from Ikea that is deep enough to conceal some hardware. I originally planned to use it to embed a few LED matrixes behind some artwork to display messages, but decided to use to mark my location on a Cold War era Soviet made map of the Bay Area.
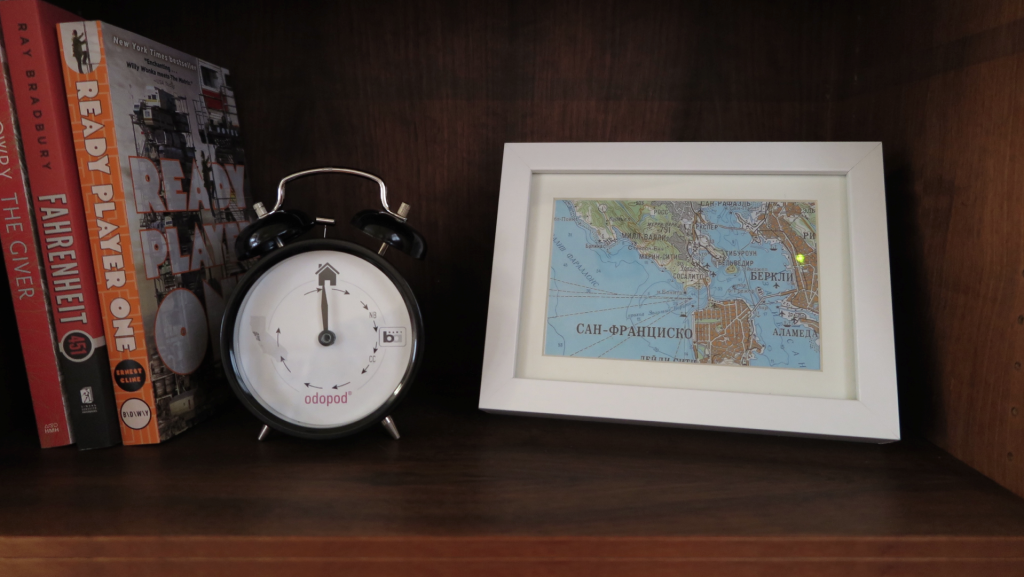
Dad Finder v1(left) and v2(right)
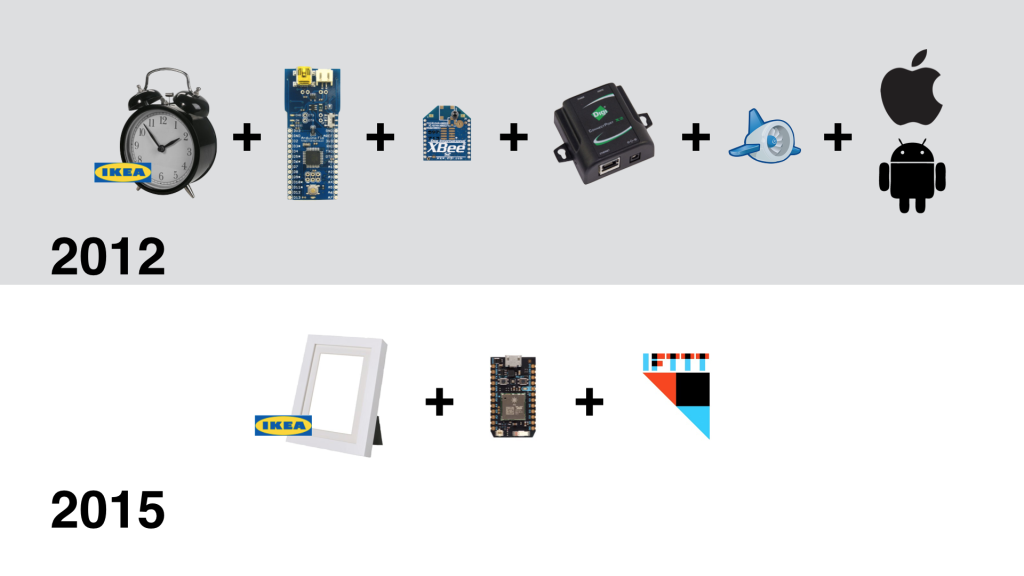
For the hardware, I chose the Particle Photon which connects with the Paticle.io cloud platform. This was a radical simplification over the first Dad Finder which used five different components to connect to the internet and expose and API for me to hit from my mobile app. Additionally, the Particle platform has the advantage of being supported by IFTTT, so I no longer needed to use my own custom app to trigger updates as I move through different geofences.
Behind the map is a series of bi-color LEDs, one per location that I want to display on the map. On entering a geofence, I light the LED green, on exiting a geofence, I light the LED red.
The code for the Photon is available on GitHub.
Adding Sound
After using the new map for a few days, I received some complaints that it no longer made any sound. In the first version, the clock’s hand is moved by a hobby servo that makes a signature sound when moving the hand to a new position. The LEDs updated soundlessly and it turns out that my family missed having the audio cue that let them know that I was on the move.
To remedy the situation I added a small piezo speaker to the picture frame and added the ability to play melodies as the different zones are activated. We decided that some snippets from classic video games would do the trick. At present it plays the Mario 1-up sound when it starts up and either the first 4 notes or all 12 notes from the Zelda found item tune. Expanding the set of melodies so that each geofence has its own sound is on the todo list.
Using the Photon
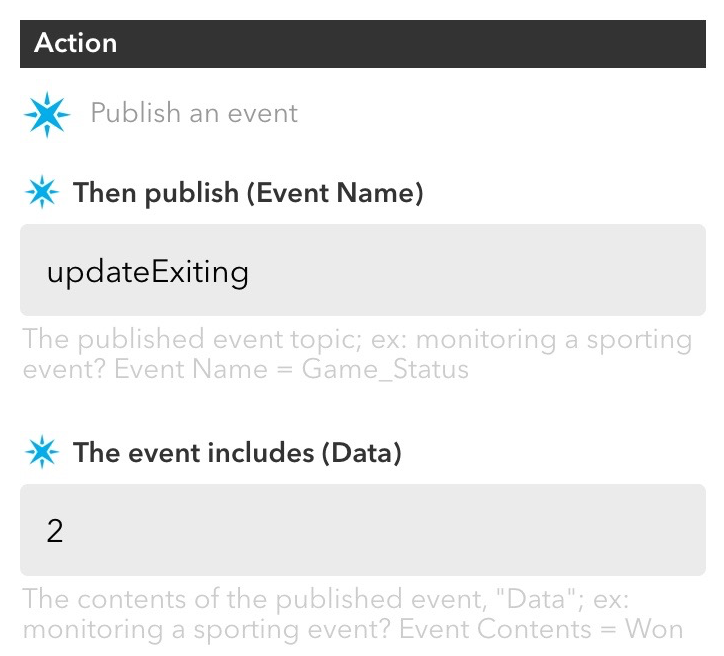
I really enjoyed working with the Particle Photon hardware. The whole platform is quite easy to use and it is nice not to have to think about connectivity at all. To pass messages between IFTTT and my Dad Finder, I subscribe two functions in my Photon code (lines 9 and 10 in the source code). To trigger the function, I set up a series of recipes in IFTTT each defines a geofence and publishes to either the updateExisting or updateEntering event with Data that identifies the correct LED to light within the data of the event.
Screen capture of example recipe from IFTTT
These events automatically trigger the assigned functions within the Photon code (lines 33 and 40 of the source code).
This is radically more simple than working with the Xbee radio which required coding and configuring many more pieces including the Arduino board, the radio module, the hub, the Digi cloud service and an App Engine app to trigger the events reported from my mobile app. What took many weekends to set up on version 1 of Dad Finder took only a couple hours for version 2.
The components used to connect v1 (top) and v2 (bottom)
However, it did take a bit of time and trial and error to get things stable on the Photon. Originally I was trying to use an LED matrix and backpack from Adafruit, but using that in combination with the cloud platform seemed too much for the Photon. I found myself restarting the board often to reestablish connectivity with the cloud. Even after simplifying the code to its present state, I have had to update the firmware to improve reliability.
Eggbot eggs 2015 : genetic algorithm
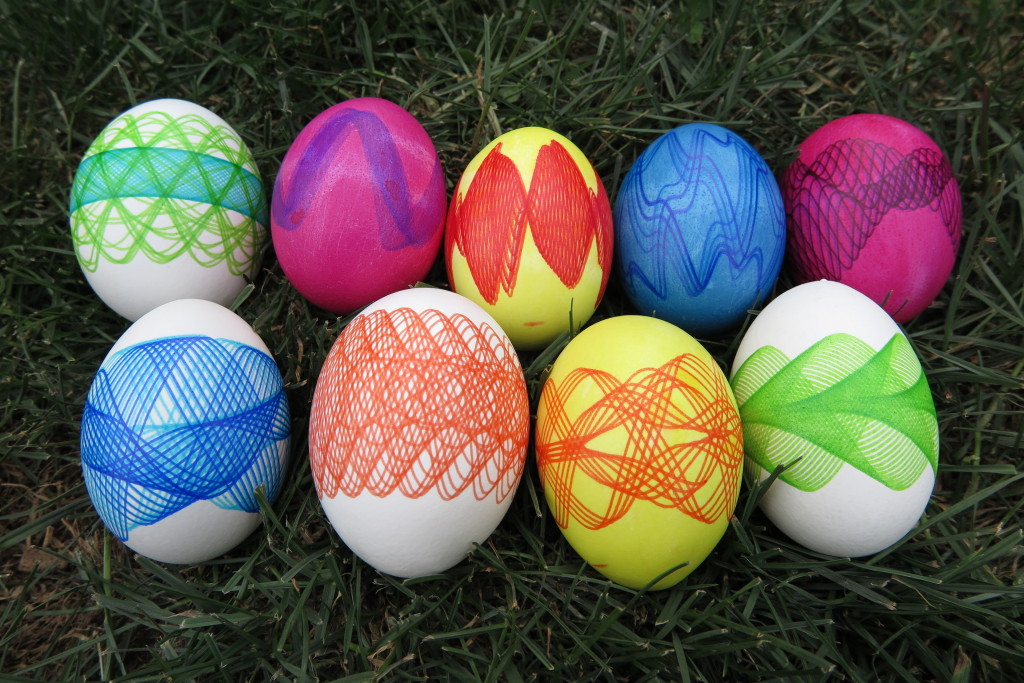
This year’s addition to my eggbot programs is a genetic algorithm that evolves complex sine waves. Each of the eggs in the photo above was printed from the same program with waves evolved from random seeds.
The individual designs
Each design is a sine wave with eight different parameters:
- Amplitude
- Length
- The number of waves to be strung together
- Amplitude of the first modulation applied to the amplitude
- Length of the first modulation applied to the amplitude
- Amplitude of the second modulation applied to the amplitude
- Length of the second modulation applied to the amplitude
- The modulations to be used (either 1 or both 1 & 2)
The video above shows how the 8 parameters modulate the wave and how patterns build up over time.
How the genetic algorithm works
Each time the program is run, an initial population is created with 50 individual designs — each with random values assigned to the eight parameters. You then rate each individual design before evolving the next generation. The algorithm chooses individuals to carry on to the next generations (highly rated designs are more likely to be carried forward, but low rated designs may still be used).
Designs that are carried forward are likely to be bred with other designs chosen for the next generation. Breeding involves picking a random integer N between 1 and 8 and taking the first N parameters of one individual and swapping them with the first N parameters of the other. This cross-over of the parameters creates new variations of the designs with qualities of both individuals (the parents). There is also a slim chance that one or more of the child’s parameters will change (mutate) between generations.
The evolution process makes it relatively easy to search through a very wide range of possible combinations of parameter values by simply choosing designs with aspects that you like and seeing what different combinations of these qualities look like.
I found that populations of 50 individuals are broad enough to get very interesting results in fewer than 10 generations while not having to rate too many design with each evolution.
The output
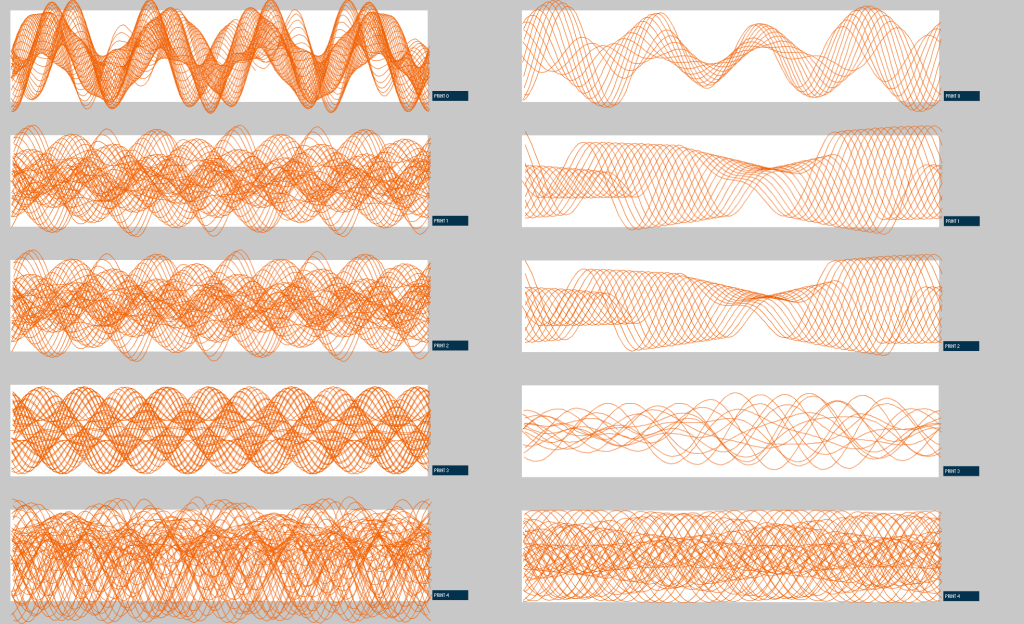
Below is a collection of 10 different designs generated in the same session.
Each column in the image above shows the lineage of the design in the top row. This top row is the 5th generation. The next row down is the highest rated parent from the 4th generation. Coincidentally, neither of these designs were changed between the 3rd and 4th generation.
The code
The program is written in processing and the source is available on github.
The algorithm is not limited to sine waves. To implement your own design, modify the Indivdual.pde file with any number of parameters. All my parameters are floats between 0 and 1, but this is not a requirement so long as you adjust your this class’ mutate function to fit your variable types.
The other classes in the repository set up the UI and manage the evolution or individuals over multiple generations. You may choose to manipulate the following three variables in GA_eggbot.pde to work with different population sizes and different probabilities for crossovers and mutations.
If you do make a design of your own, let me know in the comments below.
Transforming Sphere Lamp
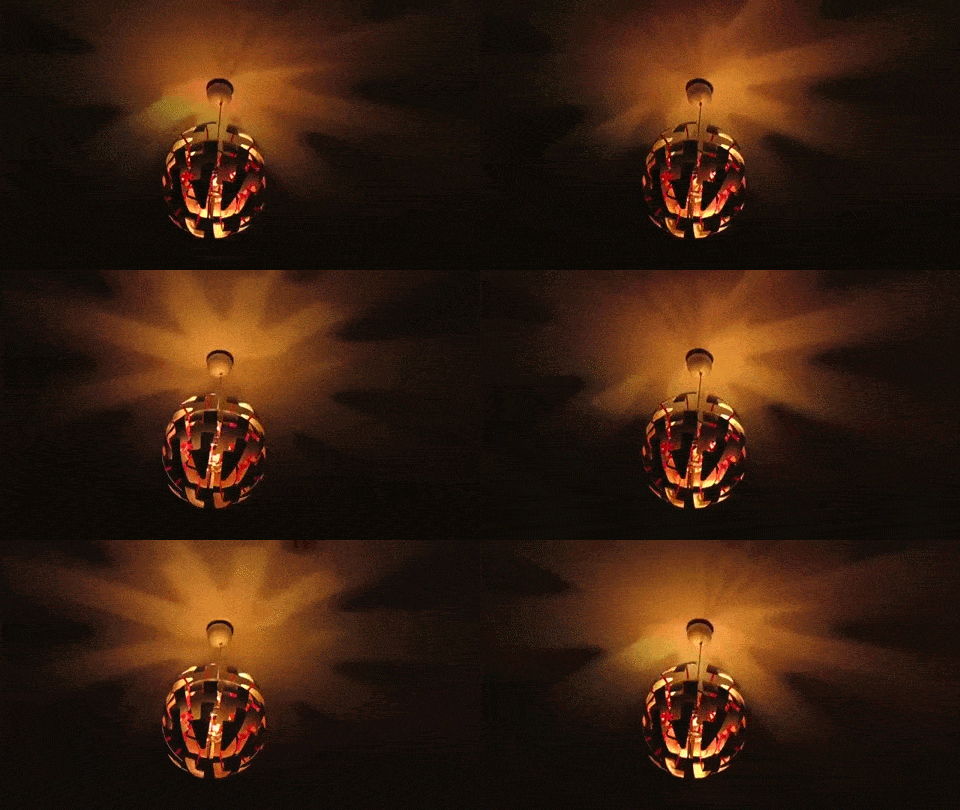
The Death Star inspired IKEA PS 2014 Pendant Lamp is a great platform for a connected home hack. Mine is shown in the video below.
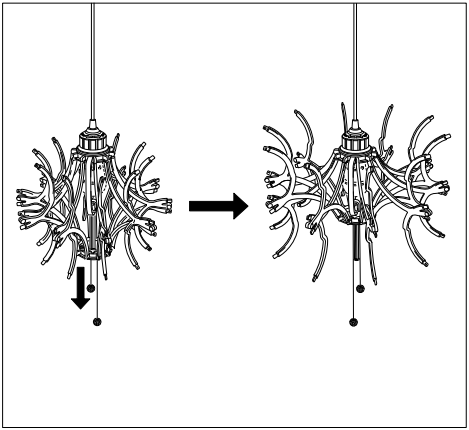
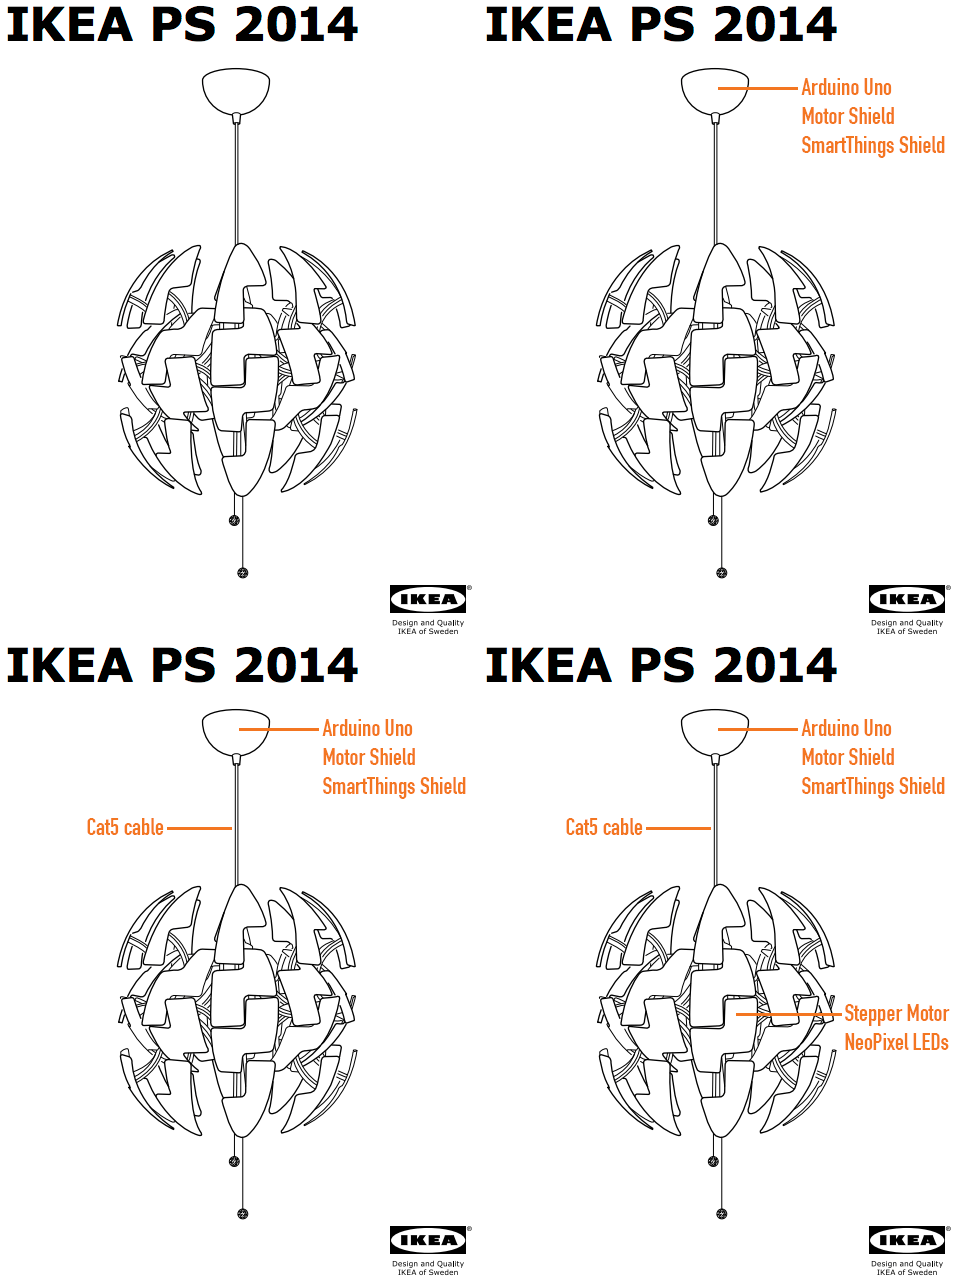
Out of the box, the lamp uses a string and pulley system to open and close the spherical shell. It is a relatively simple mechanism where two strings pull a platform up and down a central spine. Ten scissoring arms attach to this moving platform and to a fixed platform near the top of the lamp. Moving the bottom platform up the spine spreads the outer ends of the arms, opening the lamp’s outer shell (see diagram below from the lamp’s assembly manual).
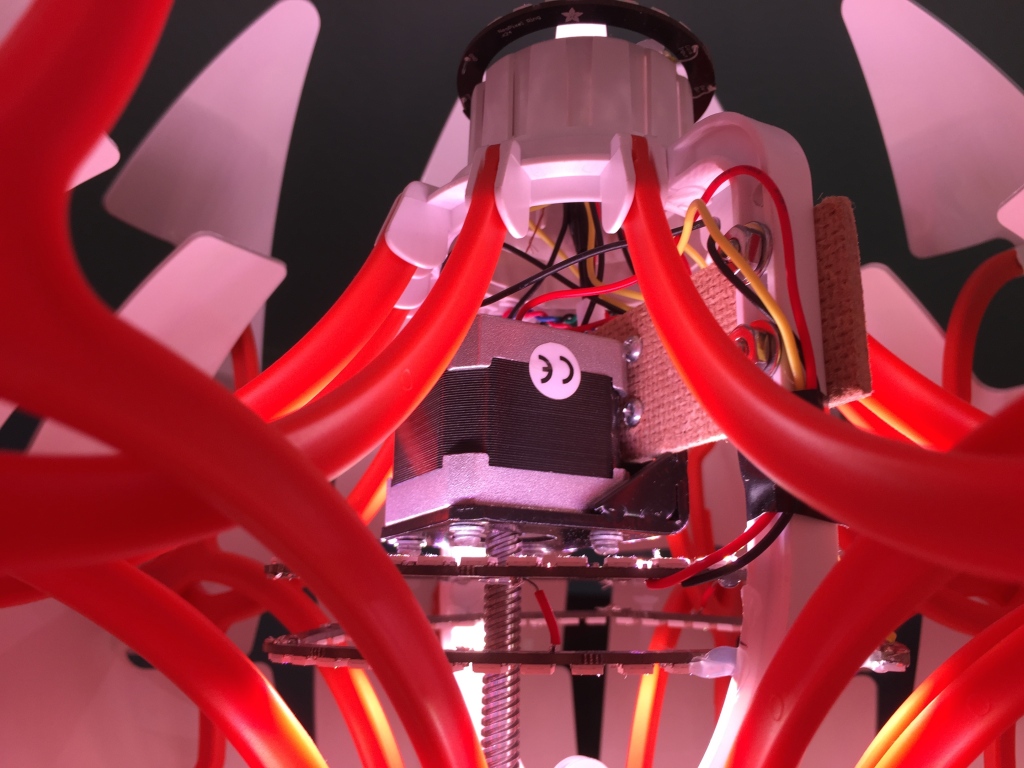
There is a void where the lightbulb normally sits between the top-most position of the moving platform and the upper platform. This provides the space for the stepper motor and LEDs needed for my modifications. The upper portion of the spine which splits in two to accommodates this space also offers a convenient platform to attach these new bits to.
Lastly, there is cap used to cover the wiring where the lamp anchors to the ceiling. This provides a convenient space for electronics. In my case, I’m using an Arduino Uno, an Arduino Motor Shield and a SmartThings Shield.
I replaced the standard wiring with a Cat5 ethernet cable to connect my electronics in that cap to the motor and LEDs in the body of the lamp. Four of the Cat5 wires are used to control the motor and three for the LEDs, leaving one unused wire.
Stepper Motor
Given the design of the lamp, it seemed easier to directly drive the lamp’s lower platform rather than try to pull the strings that the lamp ships with. I first thought I would attach a threaded rod to a standard stepper motor, but then I found this motor with a lead screw that is long enough to cover the entire length of the lamp’s spine.
I attached the motor using a standard mounting plate and a fiberboard bridge attached to the central spine of the lamp.
Driving the motor was simple once I found a motor shield that could power it. I first tried Adafruit’s Motor Shield, but it does not provide enough power. After realizing this, I did a bit more research and determined that the Arduino Motor Shield should be able to drive the motor. And it is.
The video above shows the motor moving the platform and opening two of the ten arms. When the lamp was finally assembled, I cut off the last few inches of the screw so that it was just a little longer than the spine.
NeoPixel LEDs
For the lights, I wanted the flexibility to individually control an array of RGB LEDs. I’ve used the NeoPixel rings before in another project and really like how simple they are to use and how the ring format provides very nice visual effects with relatively simple animations.
Given the design of the lamp and the need to work around the motor’s position, I wanted to use the larger 60 LED ring configuration. Unfortunately, the rings could not fit in any one location when the lamp’s arms were both extended and contracted. Luckily, each 60 LED rings is actually made of four 1/4 circle arcs. I ended up using two sets of three arcs in triangular configurations (one triangle facing down and one facing up).
I then added a 24 LED ring to the top of the lamp to add a bit more brightness. This also works to fill some of the shadows cast on the ceiling by the internal LEDs. The results are great, especially when the lights are animating.
SmartThings
I’m using the SmartThings platform to control the lamp. I went this route for two reasons: it is relatively easy to build a controller UI to use within the SmartThings app and I can integrate it with other things in my house connected to the SmartThings platform.
I created the UI by writing a device handler. The handler sends commands as strings to the SmartThings Shield which are then passed as a parameter to a designated handler function running on the Arduino.
I have not yet connected the lamp to other things but this can be done by writing a SmartThings app.
Memory
Very early on in the project, it was clear that constrained RAM on the Uno would be an issue. The first indication was that the board kept restarting with all three components integrated (while any two components worked well).
The first step was to do some simple optimizations to the types of variables I use (e.g. uint8_t in place of int). With this I was able to could get the three components working together; however, memory was still maxing out when I sent long strings from SmartThings. “SetColor: 255,255,0” would work but, “SetColor: 255,255,255” would cause problems. Simply shortening these to “sc:255,255,255” did the trick.
Then something quite surprising happened. The .toInt() function that I use to convert the strings to integers would periodically stop working and convert any three color values to 0,0,0 until I restarted the Arduino board.
I tracked this down to what I believe to be another memory issue, but one more complicated than simply running out of memory. Removing the motor code from the project (and freeing a good deal of memory) was not fixing the issue. On the other hand, removing some of the strings from the sketch that were used to parse the commands sent from SmartThings (freeing up very little memory) did fix this new problem.
In the end, the fix was to further shorten all command strings and to reduce the overall number of commands by consolidating related commands into individual commands with enums.
Persistance
The lamp can be turned on and off from a standard wall switch so it was important to me that I persist some of the settings while the power was off.
Retaining the position of the moving platform is most important since doing so frees me from adding sensors to know when the lamp is fully open or closed (and thus keep the motor from grinding away once it reaches one extreme or the other).
I also save the NeoPixel RGB and brightness values.
I originally planned to use an FRAM memory module but my previously mentioned memory constraints as well as some pin constraints imposed by the motor shield forced me to reconsider. I decided instead to take a shortcut and use the Arduino’s built in EEPROM memory. This is volatile memory rated for 100,000+ writes, but I’m ok with that trade-off for now.
Power
During development I powered the motor and lights through the Arduino with the lights hooked up to VIN. This worked fine as long as I dimmed the LEDs before running the motor.
However, when run at any significant brightness for moderate periods of time, the power would cut off. This is because the 114 NeoPixels pull about 3 amps at full brightness and my 2 amp power source shuts itself off before damage is done (there is a thermal switch that is thrown as it overheats). Using the recommended calculations it was clear that I should be using a dedicated power supply rated for at least 7 amps.
In the final installation, the lamp is powered by two 5V supplies. The first is a 2 amp supply used for the Arduino and motor plugged into the Arduino’s barrel jack. The second supply is a 10 amp supply connected to the LEDs using this barrel jack adapter (with the ground tied to both the LEDs and the Arduino).
Thats about it
All in all, this was a fun project and I’m pleased with the the results. It presented a number of puzzling challenges both with modifying the physical lamp and getting the different electronics working together and I learned a number of new details along the way.
You can find the Arduino and SmartThings code on GitHub.
If you have any questions let me know in the comments and I’ll do what I can to answer them. And, if this you build your own, I’d love to see it.
Getting Started with Arduino
If you are new to electronics, but want to start making things with Arduino, I recommend that you begin with an Uno and these great resources.
- Make’s Getting Started with Arduino book
- Make’s Ultimate Arduino Microcontroller Kit
The book includes a brief introduction to electricity and then dives into working with Arduino.
The kit includes many of the things you will want to play with as you read the book and includes an Uno.
Once you have a handle on the basics, you can add internet connectivity with the Arduino WiFi Shield or step up to the Yun.
The WiFi Shield can be used easily with the Uno, but it will limit the amount of memory and the IO pins available to you. The Yun avoids these limitations, but has some frustrating idiosyncrasies to it. Because of these idiosyncrasies, I don’t recommend the Yun for beginners.
Prototyping the Internet of Things
Eggs 2014
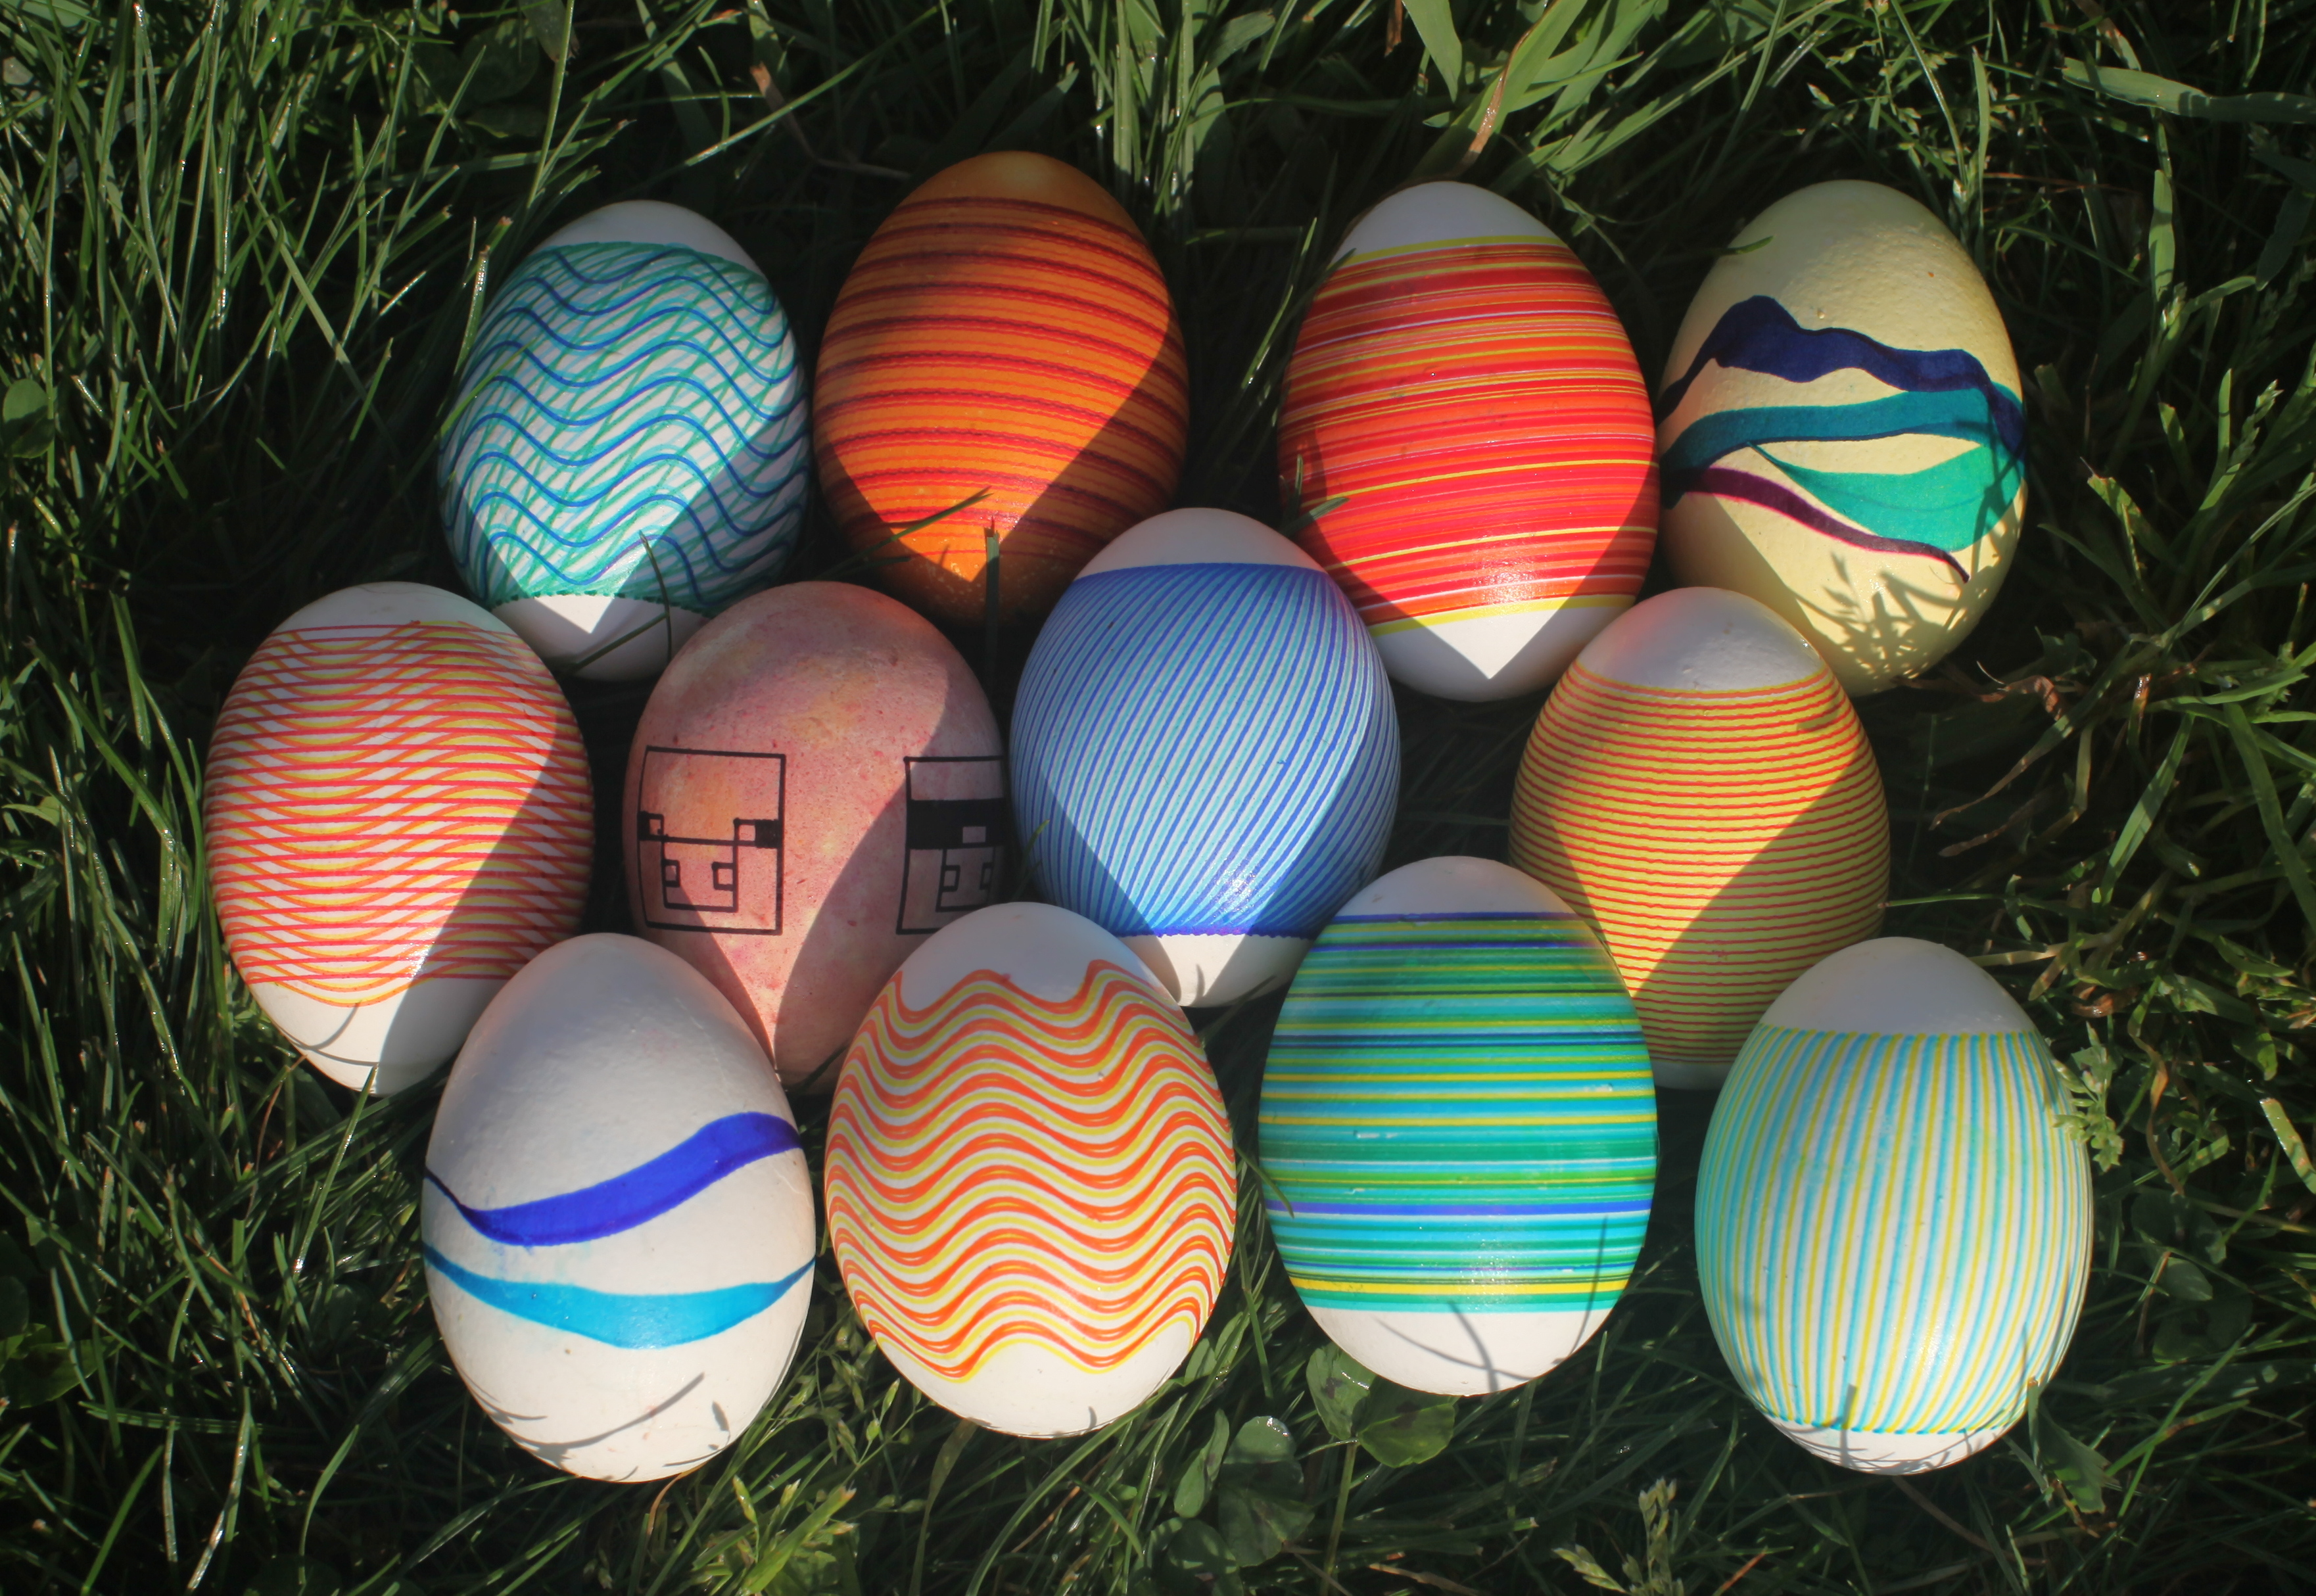
Sine waves were a popular choice for this year’s eggs. And the Minecraft pigs were in demand as always.
All the eggs pictures except the pigs were plotted directly from Processing, the pigs were drawn using Inkscape.
I’ll post the files to Github within a couple weeks.
update: code and svg files are now available on Github.
Air Quality Egg Mod
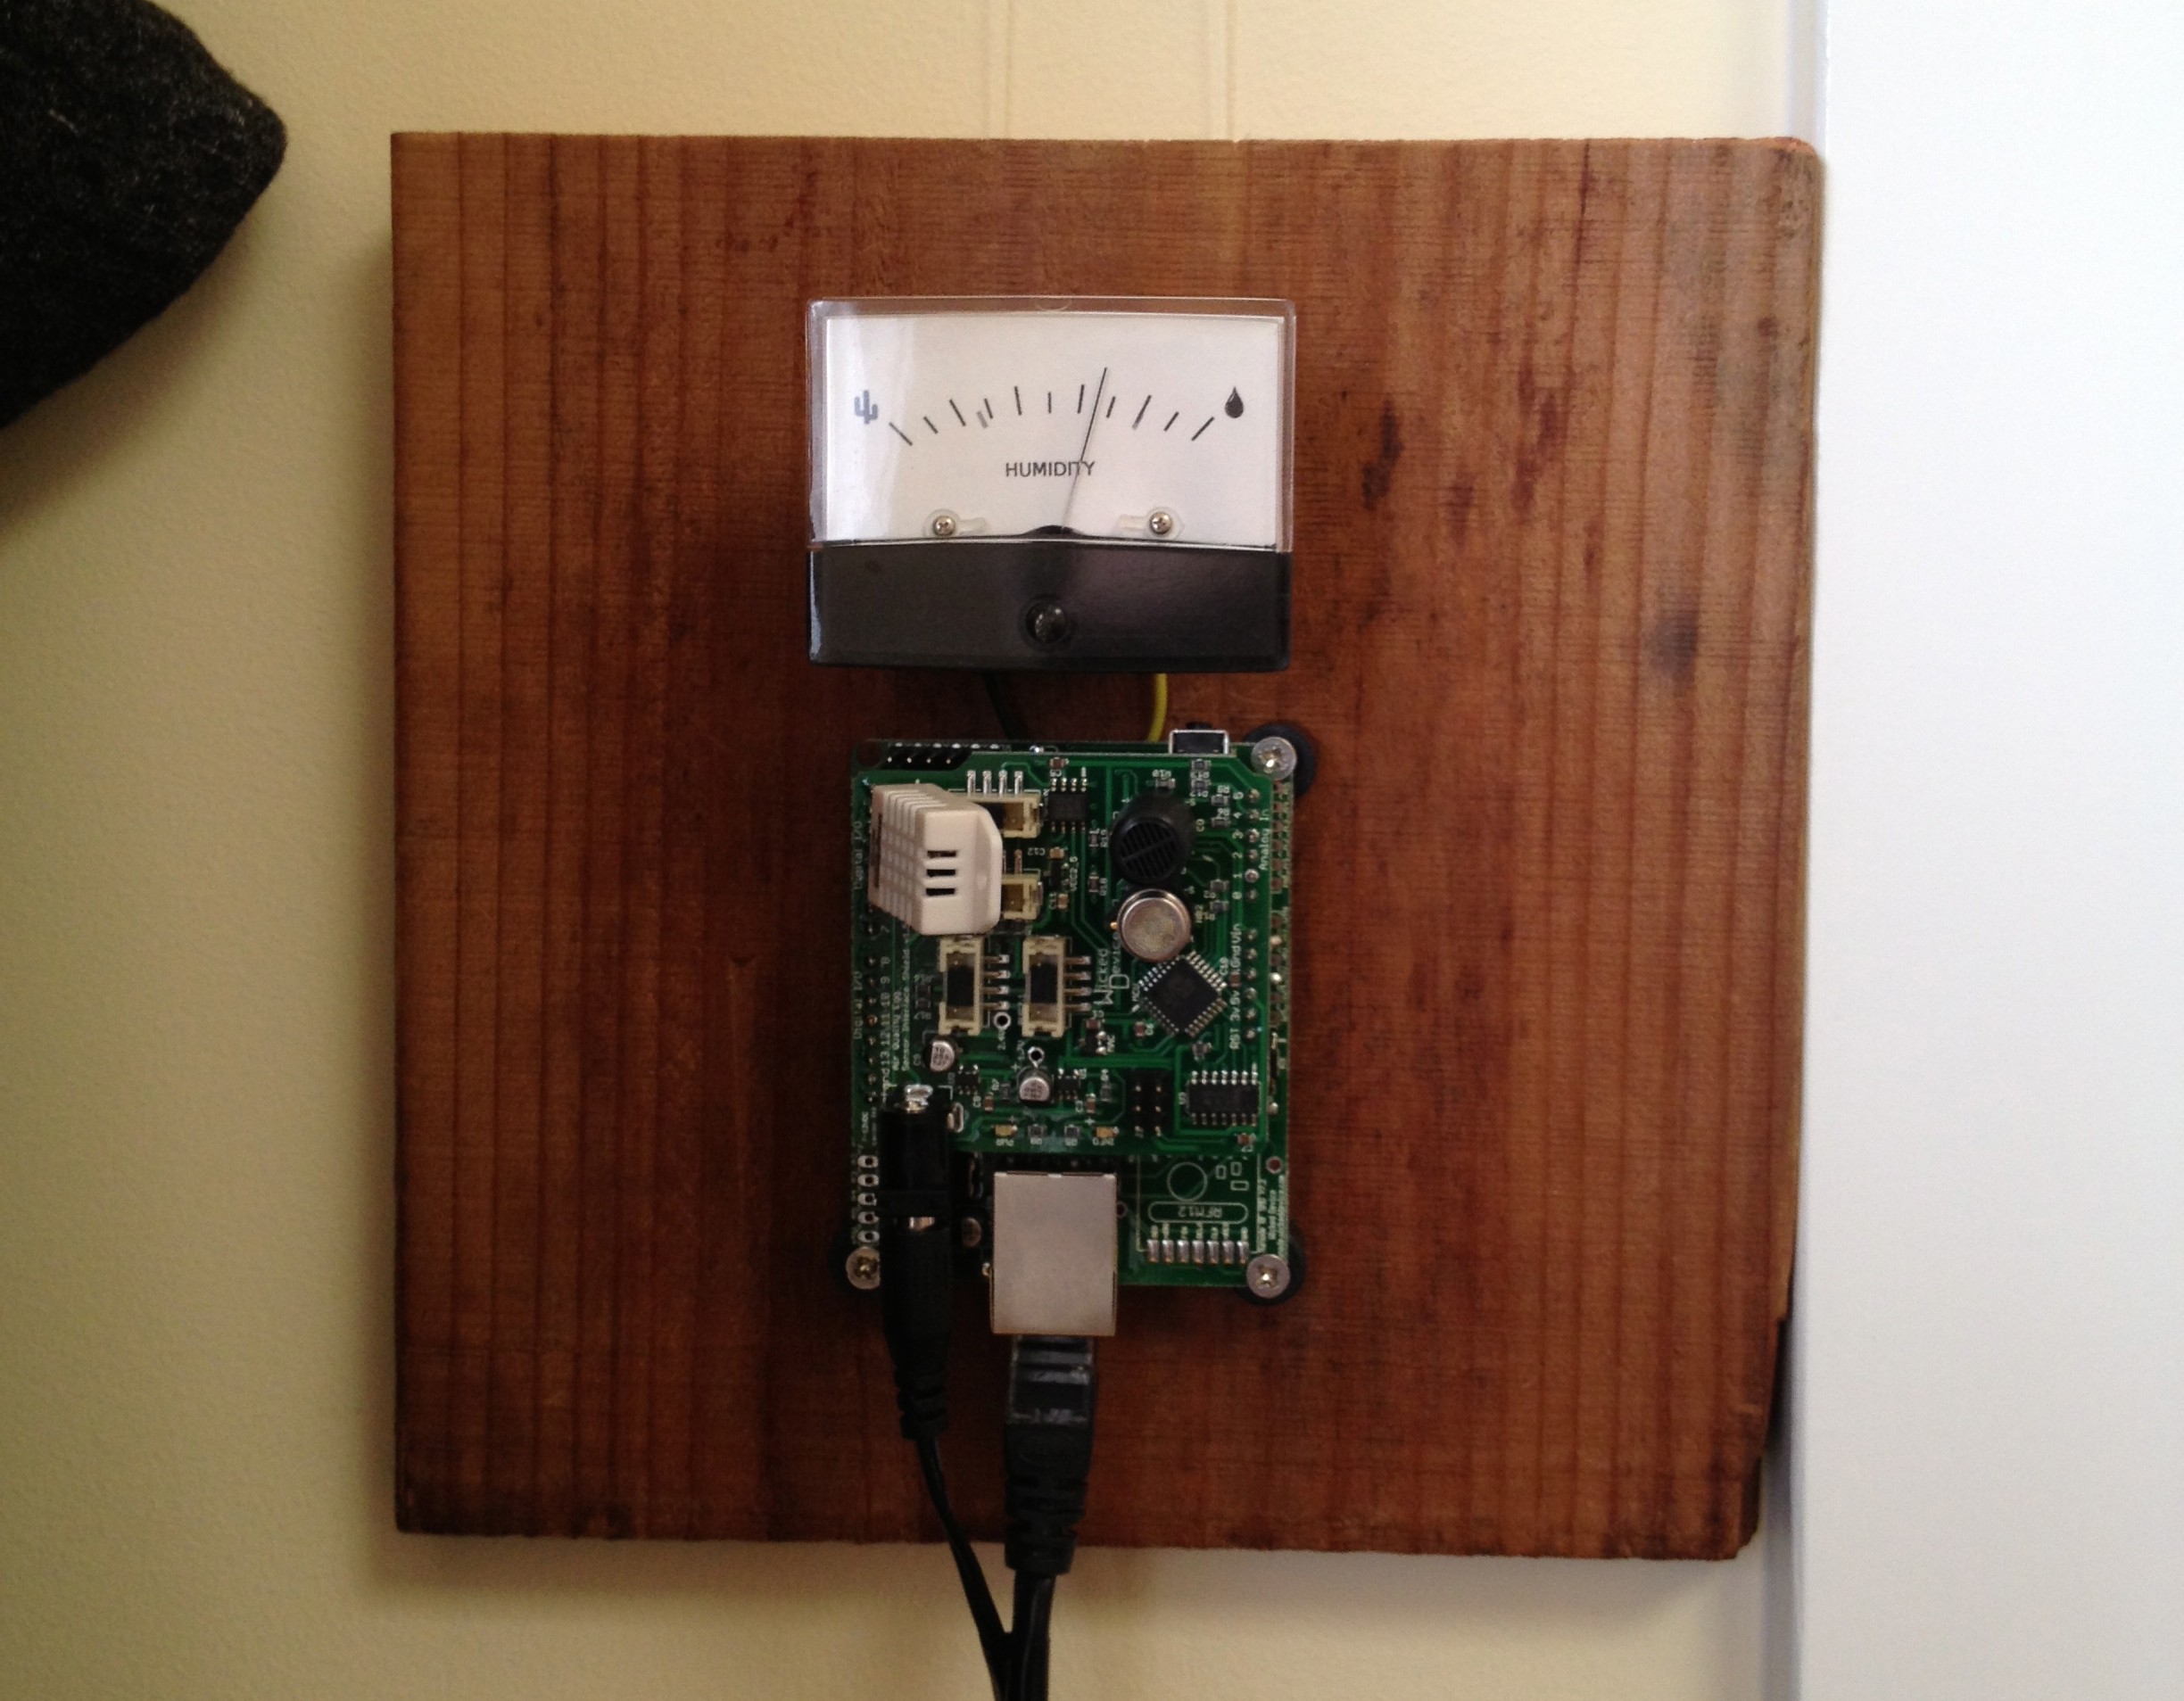 I was not thrilled with the air quality egg enclosure that shipped with the final product and since I planned to use it inside, I decided to mount it on a plank of wood and leave the circuitry exposed. I also wanted some sort of display so I added a meter and modified the code to use pin 3 (pwm) to display the humidity.
Original project date: April, 2013.
