The Death Star inspired IKEA PS 2014 Pendant Lamp is a great platform for a connected home hack. Mine is shown in the video below.
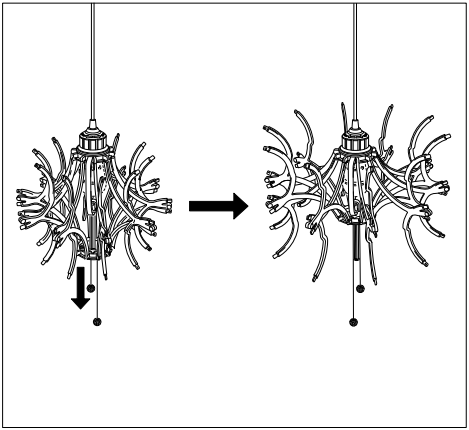
Out of the box, the lamp uses a string and pulley system to open and close the spherical shell. It is a relatively simple mechanism where two strings pull a platform up and down a central spine. Ten scissoring arms attach to this moving platform and to a fixed platform near the top of the lamp. Moving the bottom platform up the spine spreads the outer ends of the arms, opening the lamp’s outer shell (see diagram below from the lamp’s assembly manual).
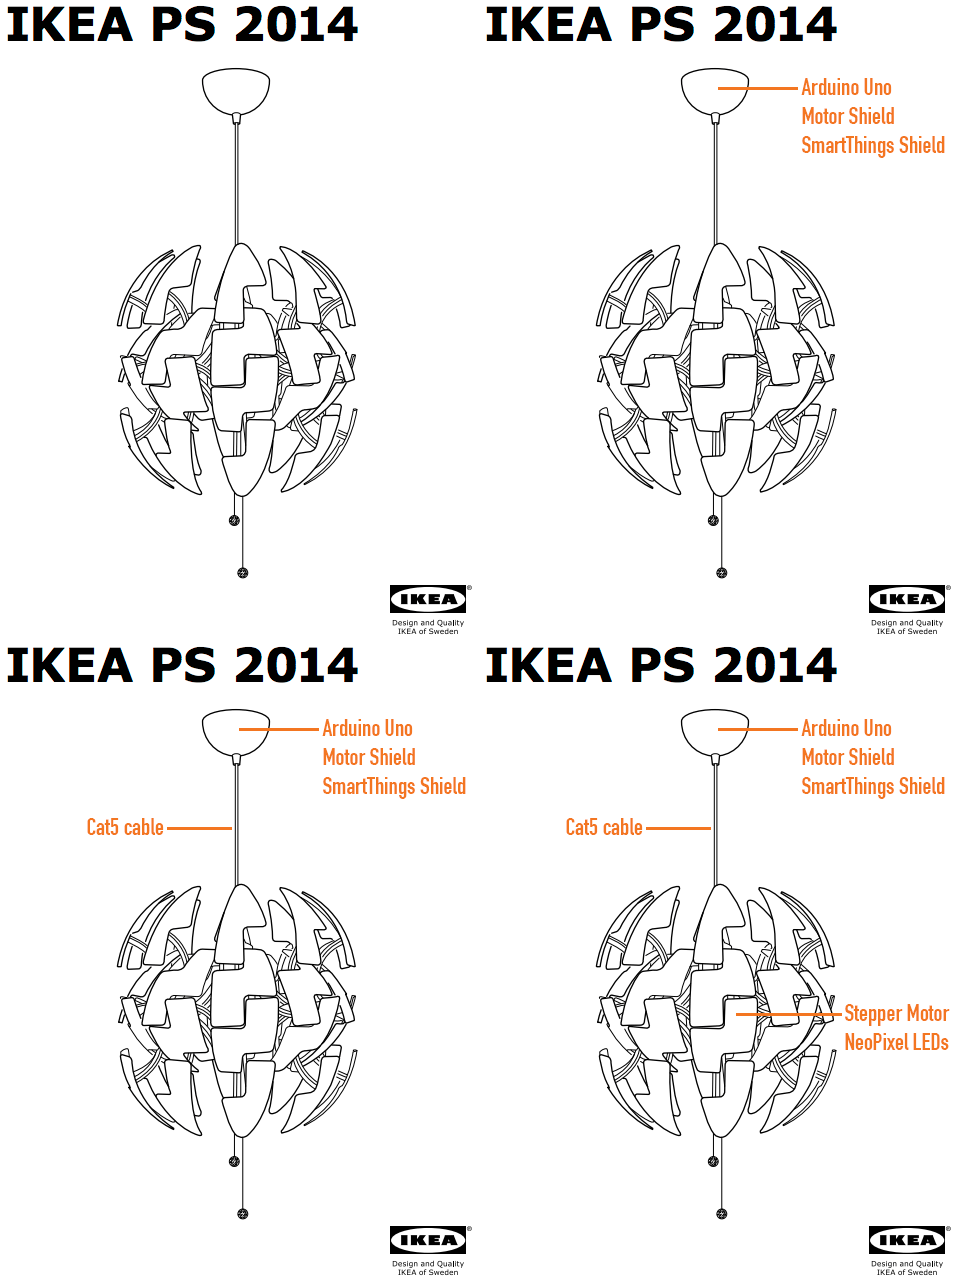
There is a void where the lightbulb normally sits between the top-most position of the moving platform and the upper platform. This provides the space for the stepper motor and LEDs needed for my modifications. The upper portion of the spine which splits in two to accommodates this space also offers a convenient platform to attach these new bits to.
Lastly, there is cap used to cover the wiring where the lamp anchors to the ceiling. This provides a convenient space for electronics. In my case, I’m using an Arduino Uno, an Arduino Motor Shield and a SmartThings Shield.
I replaced the standard wiring with a Cat5 ethernet cable to connect my electronics in that cap to the motor and LEDs in the body of the lamp. Four of the Cat5 wires are used to control the motor and three for the LEDs, leaving one unused wire.
Stepper Motor
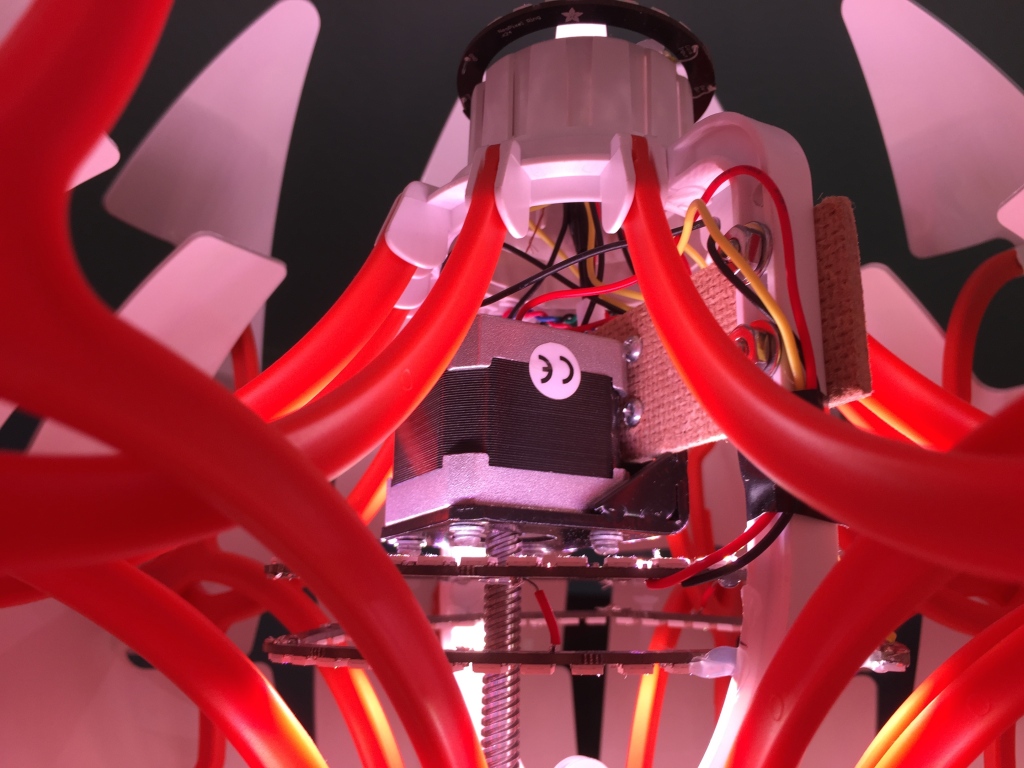
Given the design of the lamp, it seemed easier to directly drive the lamp’s lower platform rather than try to pull the strings that the lamp ships with. I first thought I would attach a threaded rod to a standard stepper motor, but then I found this motor with a lead screw that is long enough to cover the entire length of the lamp’s spine.
I attached the motor using a standard mounting plate and a fiberboard bridge attached to the central spine of the lamp.
Driving the motor was simple once I found a motor shield that could power it. I first tried Adafruit’s Motor Shield, but it does not provide enough power. After realizing this, I did a bit more research and determined that the Arduino Motor Shield should be able to drive the motor. And it is.
The video above shows the motor moving the platform and opening two of the ten arms. When the lamp was finally assembled, I cut off the last few inches of the screw so that it was just a little longer than the spine.
NeoPixel LEDs
For the lights, I wanted the flexibility to individually control an array of RGB LEDs. I’ve used the NeoPixel rings before in another project and really like how simple they are to use and how the ring format provides very nice visual effects with relatively simple animations.
Given the design of the lamp and the need to work around the motor’s position, I wanted to use the larger 60 LED ring configuration. Unfortunately, the rings could not fit in any one location when the lamp’s arms were both extended and contracted. Luckily, each 60 LED rings is actually made of four 1/4 circle arcs. I ended up using two sets of three arcs in triangular configurations (one triangle facing down and one facing up).
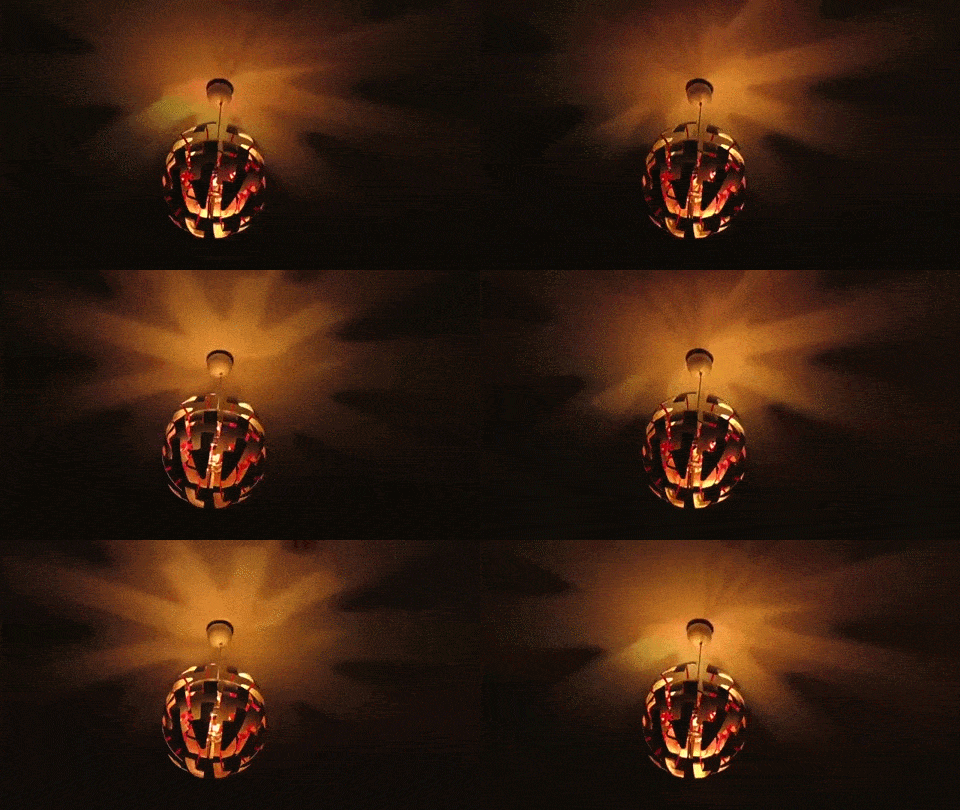
I then added a 24 LED ring to the top of the lamp to add a bit more brightness. This also works to fill some of the shadows cast on the ceiling by the internal LEDs. The results are great, especially when the lights are animating.
SmartThings
I’m using the SmartThings platform to control the lamp. I went this route for two reasons: it is relatively easy to build a controller UI to use within the SmartThings app and I can integrate it with other things in my house connected to the SmartThings platform.
I created the UI by writing a device handler. The handler sends commands as strings to the SmartThings Shield which are then passed as a parameter to a designated handler function running on the Arduino.
I have not yet connected the lamp to other things but this can be done by writing a SmartThings app.
Memory
Very early on in the project, it was clear that constrained RAM on the Uno would be an issue. The first indication was that the board kept restarting with all three components integrated (while any two components worked well).
The first step was to do some simple optimizations to the types of variables I use (e.g. uint8_t in place of int). With this I was able to could get the three components working together; however, memory was still maxing out when I sent long strings from SmartThings. “SetColor: 255,255,0” would work but, “SetColor: 255,255,255” would cause problems. Simply shortening these to “sc:255,255,255” did the trick.
Then something quite surprising happened. The .toInt() function that I use to convert the strings to integers would periodically stop working and convert any three color values to 0,0,0 until I restarted the Arduino board.
I tracked this down to what I believe to be another memory issue, but one more complicated than simply running out of memory. Removing the motor code from the project (and freeing a good deal of memory) was not fixing the issue. On the other hand, removing some of the strings from the sketch that were used to parse the commands sent from SmartThings (freeing up very little memory) did fix this new problem.
In the end, the fix was to further shorten all command strings and to reduce the overall number of commands by consolidating related commands into individual commands with enums.
Persistance
The lamp can be turned on and off from a standard wall switch so it was important to me that I persist some of the settings while the power was off.
Retaining the position of the moving platform is most important since doing so frees me from adding sensors to know when the lamp is fully open or closed (and thus keep the motor from grinding away once it reaches one extreme or the other).
I also save the NeoPixel RGB and brightness values.
I originally planned to use an FRAM memory module but my previously mentioned memory constraints as well as some pin constraints imposed by the motor shield forced me to reconsider. I decided instead to take a shortcut and use the Arduino’s built in EEPROM memory. This is volatile memory rated for 100,000+ writes, but I’m ok with that trade-off for now.
Power
During development I powered the motor and lights through the Arduino with the lights hooked up to VIN. This worked fine as long as I dimmed the LEDs before running the motor.
However, when run at any significant brightness for moderate periods of time, the power would cut off. This is because the 114 NeoPixels pull about 3 amps at full brightness and my 2 amp power source shuts itself off before damage is done (there is a thermal switch that is thrown as it overheats). Using the recommended calculations it was clear that I should be using a dedicated power supply rated for at least 7 amps.
In the final installation, the lamp is powered by two 5V supplies. The first is a 2 amp supply used for the Arduino and motor plugged into the Arduino’s barrel jack. The second supply is a 10 amp supply connected to the LEDs using this barrel jack adapter (with the ground tied to both the LEDs and the Arduino).
Thats about it
All in all, this was a fun project and I’m pleased with the the results. It presented a number of puzzling challenges both with modifying the physical lamp and getting the different electronics working together and I learned a number of new details along the way.
You can find the Arduino and SmartThings code on GitHub.
If you have any questions let me know in the comments and I’ll do what I can to answer them. And, if this you build your own, I’d love to see it.


Excellent hack! I’m a little surprised a stepper was necessary; do you think the motion could be accomplished with a hobby servo instead? That would certainly make integration easier.
I saw an example on youtube with a servo being used to pull the original string. However that either needs to be mounted at the end of the spine or you would need to install a pulley at that end to put the servo inside the lamp. Using the stepper seemed much simpler to me and likely to hold up better over time.
Just ordered the gear to make this!
I do have some questions though…
1. The smartthings shield is currently sold out, is there a method of control any other way?
2. Do you have a wiring schematic at all for this, as to which pins you are using etc.
3. Can’t wait to build it! Thanks for the info and help
Hi Mike. Glad to hear this inspired you.
1. Yes, there are many other ways to connect your lamp to the internet. SmartThings offers some unique shortcuts. If you can’t wait for that to be available, you will have to build your own UI for controlling the lamp and provide a way for that UI to communicate with the lamp. If I were to build this lamp without SmartThings, I think I would likely use the Arduino Yun and build a web-based app on the Linux side of the Yun that provides an HTML UI and controls the Arduino sketch directly. Unfortunately, I can’t provide any simple guidance or code examples regarding this.
2. Aside the Shields, the only pins used are pin 7 which is tied to the data-in on the LEDs and Ground which is used to provide a common ground between the Arduino and the LEDs (the LED Ground is tied to the Ground on Arduino as well as the Ground (-) of the power supply).
3. Great. Send a pic when you can.
Took your advice… went with the yun .. the coding portion of this project is a bit over my head at this point… I know you said you didn’t have any code examples but any thoughts on where to start with it? I’m at a loss. For the time being I’d even like to take your code and just have it as an automated loop where the lights run a sequence and the motor engages every x minutes and then back every x seconds and the process repeats
The mechanics and wiring of all components i’m fine with.
If you want to run it without connectivity, what you will want to do is start in the loop function of the arduino sketch. This loop is run repeatedly while the sketch is running. From the loop, you can call the same functions that are called from the smartThings by calling messageCallout() with the right string. For example:
messageCallout(“sp: 50”);
messageCallout(“sc: 0,0,255”);
messageCallout(“sl: 50”);
messageCallout(“a: 0”);
The first sets the position of the motor to 50%, then next sets the color to blue (use r,g,b values between 0 and 255), the next sets the brightness to 50% and the last triggers the first animation (use value 0-4).
There two other calls that you can use to turn the lights on and off or to turn just the top or bottom lights on they are:
messageCallout(“o: 0”);
messageCallout(“m: 1”);
The first turns the lamp off (1 turns the light back on). The second lights just the top lights (0 lights them all and 2 lights just the bottom).
Great hack!
How much is the distance the motor travels to open and close?
The lower platform travels 3 3/4 inches.
Thank you very much for your answer. Would you mind publishing some more pictures of the construction? In particular mounting the lead screw?
David,
on your awesome installation where on earth did you hide the 10 amp power supply? There is actually no space to hide it anywhere.
Above this room is an attic space. I installed a new outlet up there and put both power supplies there. Then I fed only the barrel jacks down to the lamp through the ceiling.
This one http://www.digikey.de/product-search/de?KeyWords=VMS-60-5%20&WT.z_header=search_go has dimentions of 4,00″ x 2,00″ x 1,10″ (101,6 mm x 50,8 mm x 27,9 mm) and could probably fit onto the mounting plate.
Meanwhile I can control my sphere very well and it looks nice with an ESP8266. As soon as I find a solution with the power supply I’ll add neopixels to it aswell.
Thank you very much again for that great idea!
hi David
I’ve never tried to build anything electronical in my life so was wondering if this how-to-guide contains all information required even if you’ve never tried to build anything basic?
I do have experience in programming.
@Tom, unfortunately I don’t think this post includes everything you’ll need to know to build this lamp. It is intended more as inspiration to others than a how-to guide. If you are just getting started with electronics, I strongly recommend starting with something simpler and working your way up. It is well worth it though, bridging the physical and the digital is a lot of fun. One place you might want to check out for some better instruction is https://www.hackster.io/.
Dag nabbit good stuff you whrppersnappeis!
Hi, i wanna ask something about the extra led youadded. How you assemble the extra leds around the lamp?
@Naz, I used a couple different Adafruit Neopixels in the lamp. If you look closely at the stepper motor image in the post, you will see the LEDs. At the very top is a medium size ring of LEDs pointing up. Immediately below the motor are two sets of LEDs — one pointing up and the other down. These lower two rings are each made up of three these (http://www.adafruit.com/products/1768) assembled in a triangle-like shape. I first tried a full set of four of these pieces, but could not get them fit inside the lamp without obstructing the arms when the lamp is closed. I used hot glue to attach all the lights to the lamp.
Great idea, I have gathered the parts and will be attempting to build it during the holiday. IKEA released a new version of the lamp itself this year, all covered in chrome inside, which will hopefully be even more sparkly with the LED-rings. Thanks again for a brilliant tutorial!
Interesting. Good luck with the build and let me know if you post anything online.
Do you think it is possible to make the lamp spin? Like a disco-ball?
Also, I would like to connect it to an Art-Net or DMX protocol, so I would probably go for different hardware.
Still in the planning stages here, but great inspiration!
To make it spin you would need to add something to account for the wiring. I’m not familiar with the options available.
Animating the LEDs has a very interesting effect on the shadows cast by the lamp so (in my opinion) spinning the lamp itself is not needed.
? about:
“MEMORY- Very early on in the project, it was clear that constrained RAM on the Uno would be an issue. The first indication was that the board kept restarting with all three components integrated (while any two components worked well).”
Arduino Uno have 32kb Program Space. So if i buy Arduino Mega 2560 with 256kB Program Space, will it solve the menory problems?
#new in arduino
Yes, using an Arduino with more RAM should help, but I’ve not tried to use the SmartThings shield with anything other than an Uno. You may need to adjust the pins in the code.
Hi David,
Very creative, very nice. Can you build one? Against which price?
No, sorry but I am not building these for others. Thanks for your interest and for reaching out!
Pity. Of course I would have paid for it.
Unfortunately the cost is only one aspect. I’m not in a position to build or support these for others.
Do you know someone who can build it?
No. There are a few comments on this post from folks who were going to try, perhaps you can track down any posts they’ve made.
hi
great build, is it the large lamp or the small lamp you used.
im building 2 , one small and one large, the large is for my cousin he got an apartment with 6-7 meters to the top. we are going to put som ties and xwings around it… gona be awesome
waiting on the parts atm.
using WeMos D1 and arduino motor shield
to se my build go to arduino.blueeye.dk
Good luck with your build. Post here again as you make progress!
Sorry, missed your question earlier. There was only one size when I bought my lamp. I assume it is the smaller of the two available now.
Can I buy one already made? I am a lighting designer with no programming skills
No I do not sell these. Sorry.
I love the result and would like to build one, but I have one simple question. Is it still possible to have the light functioning as a light without all the discofever going on? With like a remote and an IR blaster or with your phone with Andriod and Bluetooth…
Yes, it can be programmed to light the LEDs with one color (white or other) and not flash. You can also have it respond to a variety of controllers by adding the right radio to the hardware. I had mine set up to use the SmartThings shield and be controlled through the SmartThings mobile app.
good day
you also have a wiring diagram for the neopixel rings? and the code for the fruit le bleu.
greetz bass
Hi, I used the an Arduino Uno and the SmartThings Shield for this project. All my code is here: https://github.com/davidbliss/spherelamp. Unfortunately I do not have a wiring diagram; however the code indicates the pins used (7 for the LED rings).